WiseWave is a company creating intelligent Wi-Fi devices. We build them from ground-up, focusing on security of communication and small size.
In this documentation, we include the most important information about devices and mobile app WiseWave, which allows controlling and managing Wisewave devices.
Frequently Asked Questions
I bought a device. How to install it?
You can find schematics on the relevant pages:
- Wi-Fi 2x Relay Controller
- Wi-Fi Shutter Controller
- Wi-Fi Power Relay Controller
- Wi-Fi Relay Controller
- Wi-Fi LED
- Wi-Fi LEDCW
- Wi-Fi LEDRGB
- Wi-Fi Temperature & Humidity Sensor
I installed the device. How to set it up?
Go to Quick Start Guide, where you can find description of device configuration process.
Where can I download the app from?
The WiseWave app is available on Google Play and Apple App Store.
Do I need to create an account to use WiseWave app?
No, you don't need an account to control your devices inside your local Wi-Fi network. The account is necessary only when you want to control your devices from outside your home or when you want to let other users of WiseWave app control your devices.
Where can I check your system status?
The system status can be checked at status.wisewave.eu.
Quick Start
Download WiseWave App
Download WiseWave app on your mobile phone with Android or iOS:
Installing the Device
Once you take the device out of the box, you need to connect it to power source. You can find schematics on a page about the type of the device you bought:
- Wi-Fi 2x Relay Controller
- Wi-Fi Shutter Controller
- Wi-Fi Power Relay Controller
- Wi-Fi Relay Controller
- Wi-Fi LED
- Wi-Fi LEDCW
- Wi-Fi LEDRGB
- Wi-Fi Temperature & Humidity Sensor
Device Setup
Start the WiseWave app. Upon launching the app for the first time you will be asked to allow access to your smartphone location. This is necessary for scheduling tasks on sunrise or sunset.
Location is saved on the module only. We do not pass this information to any external services.
Just after launching the app, it will ask you to name your first home. Press the Add new home button at the top of main screen and name your home.
Next steps are described in Device management section.
Add a Device to the Home
Follow instructions described in Pairing section.
Calibrate Shutter
Shutter requires calibration for remote control. Follow instructions described in Shutter Calibration section
Devices Overview
- Wi-Fi 2x Relay Controller
- Wi-Fi Shutter Controller
- Wi-Fi Power Relay Controller
- Wi-Fi Relay Controller
- Wi-Fi LED
- Wi-Fi LEDCW
- Wi-Fi LEDRGB
- Wi-Fi Temperature & Humidity Sensor
Wi-Fi 2x Relay Controller
Description
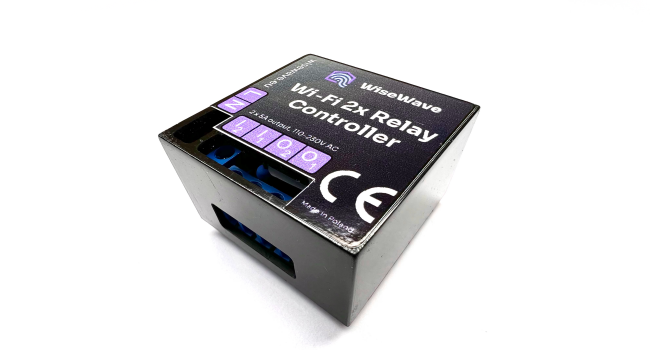
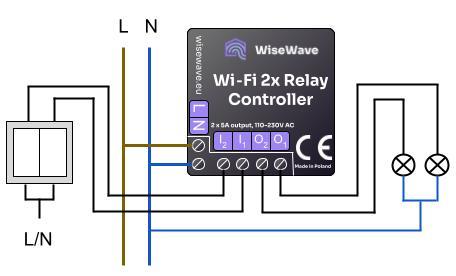
Wi-Fi 2x Relay Controller is an intelligent double switch, allowing to control two separate devices.
You can control them using WiseWave app as well as
via inputs marked I1 i I2, which control O1 i O2 outputs, respectively.
Schematics
Technical Specification
| Description | Value |
|---|---|
| Input voltage | 110 - 230 VAC |
| Power consumption | <1W |
| Number of outputs | 2 |
| Type of outputs | Relay |
| Max. output current per output | 5 A |
| Total max. output current | 10 A |
| Output voltage | Same as input voltage (110 - 230 VAC) |
| Number of inputs | 2 |
| Type of inputs | Bistable (ON/OFF) / Monostable (like doorbell) |
| Control signal | L or N |
| Wi-Fi | 802.11 b/g/n (2.4 GHz) |
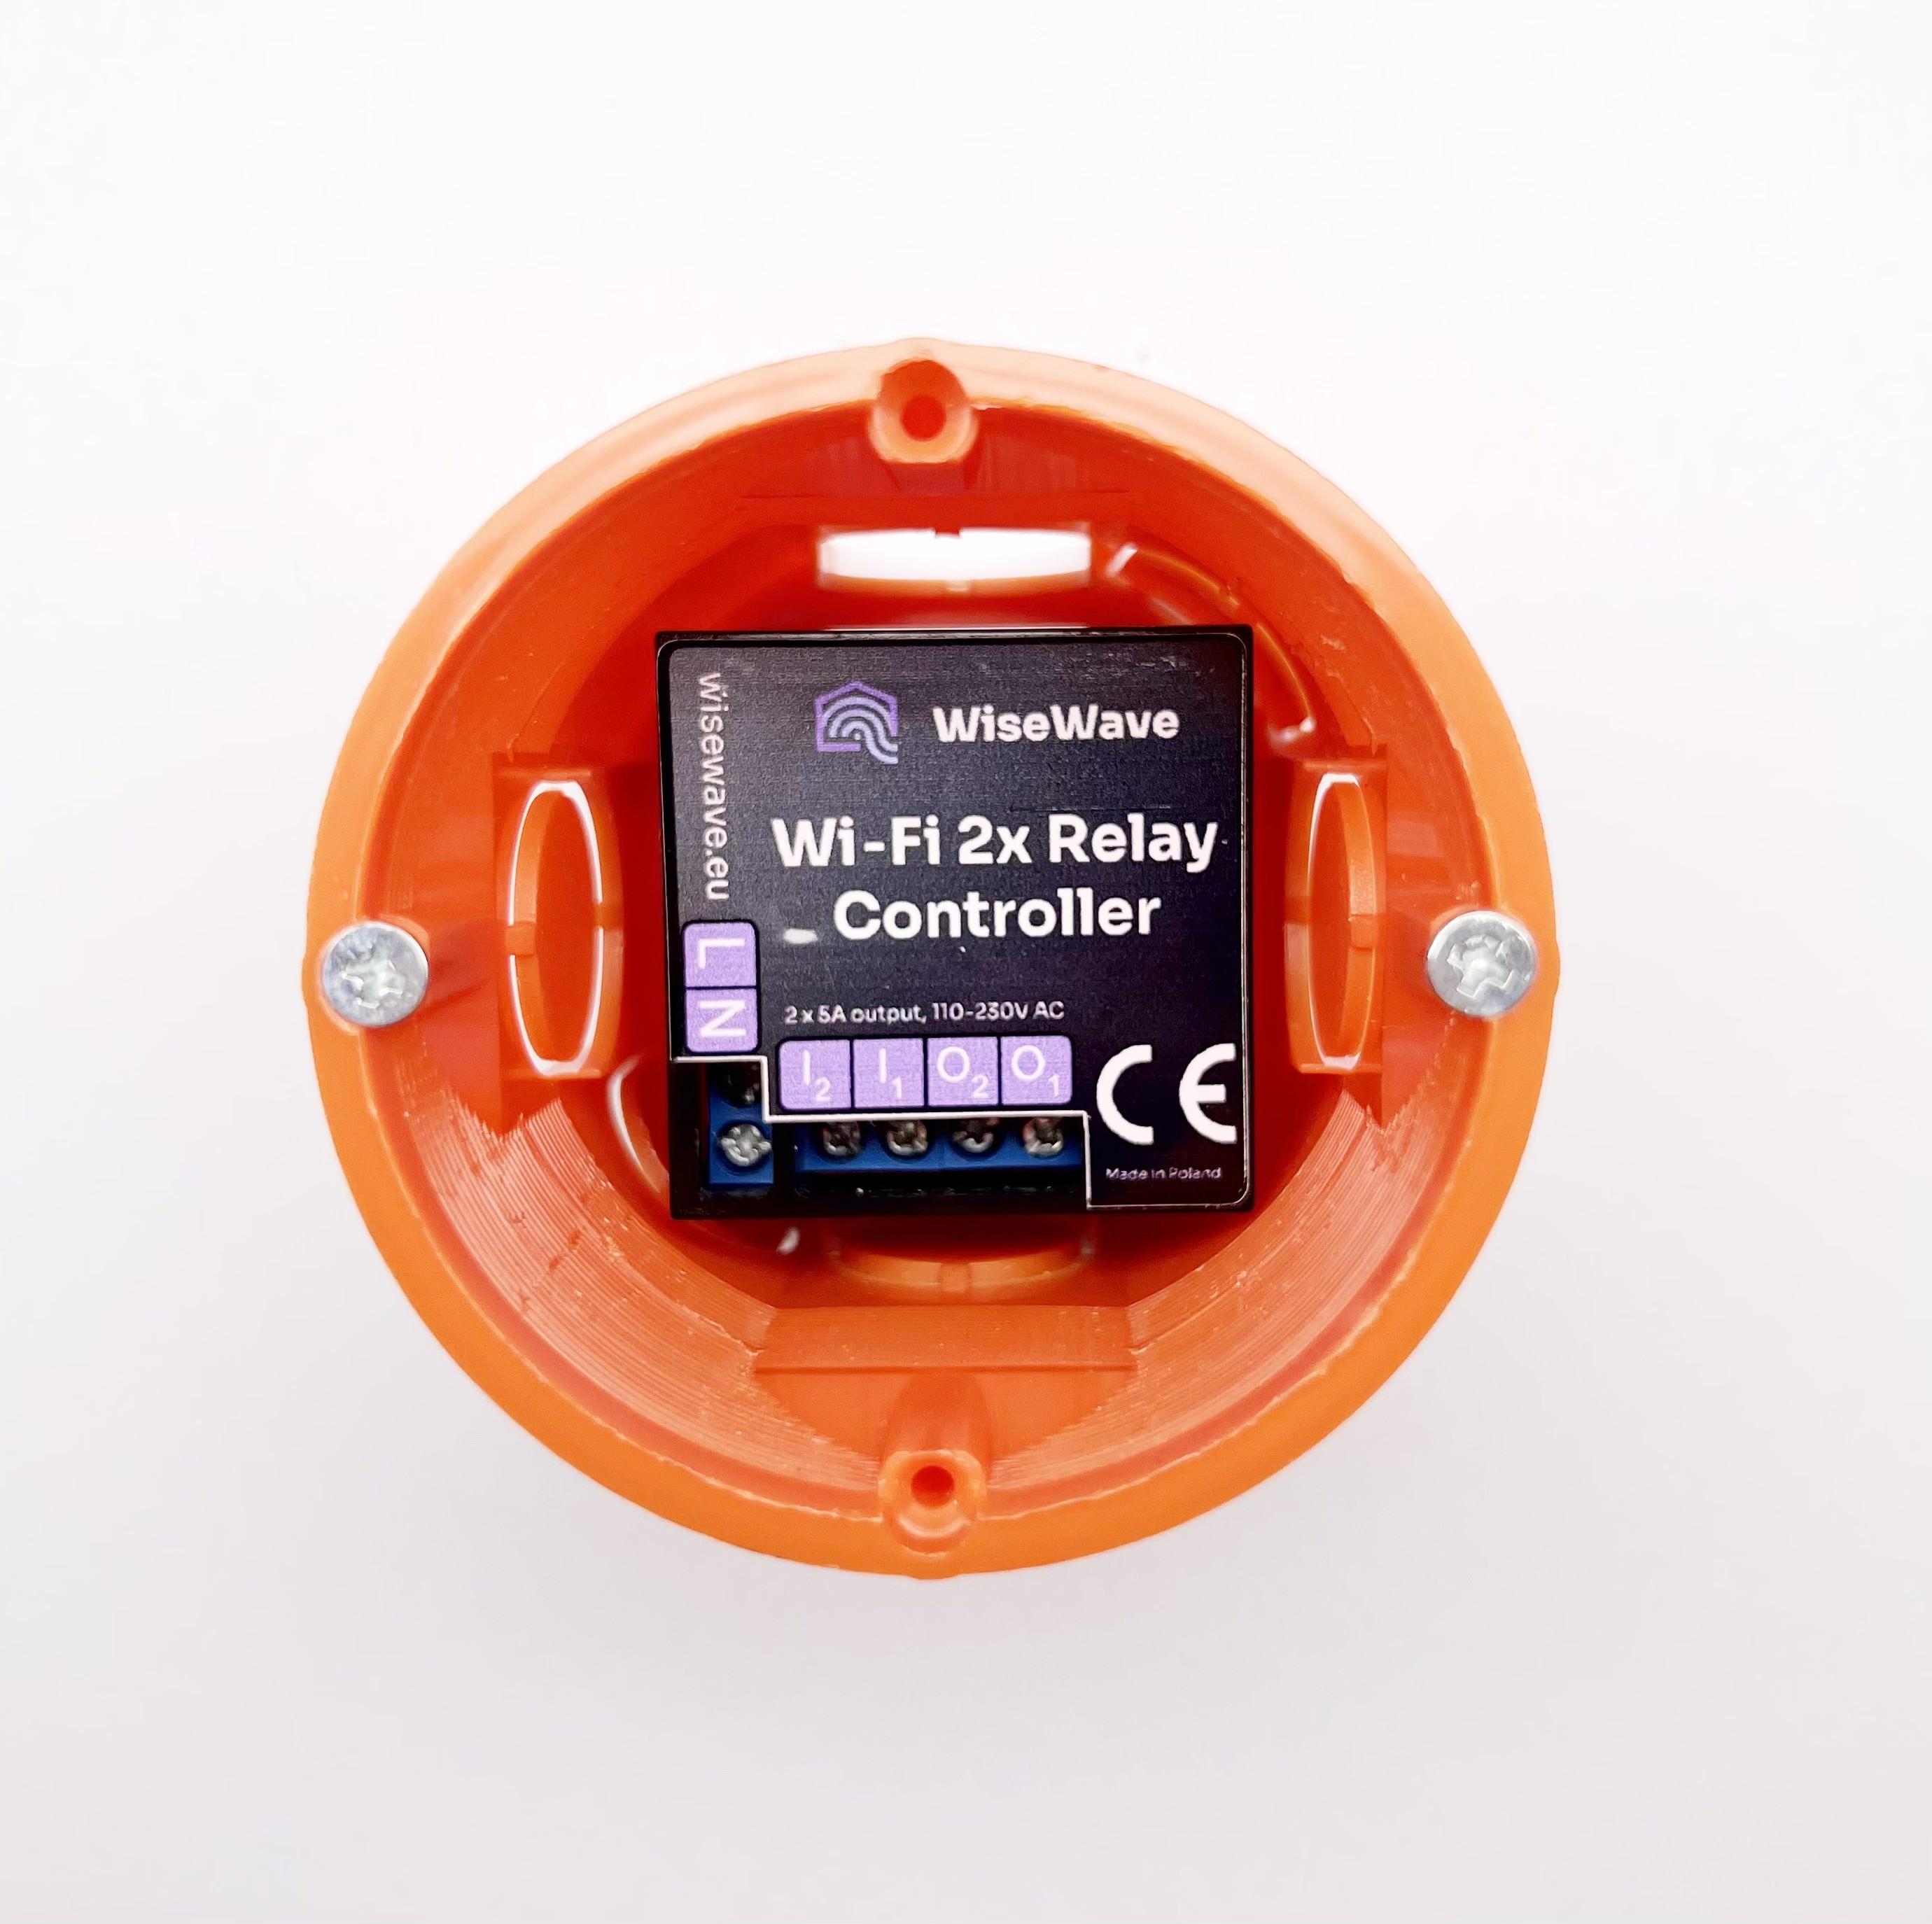
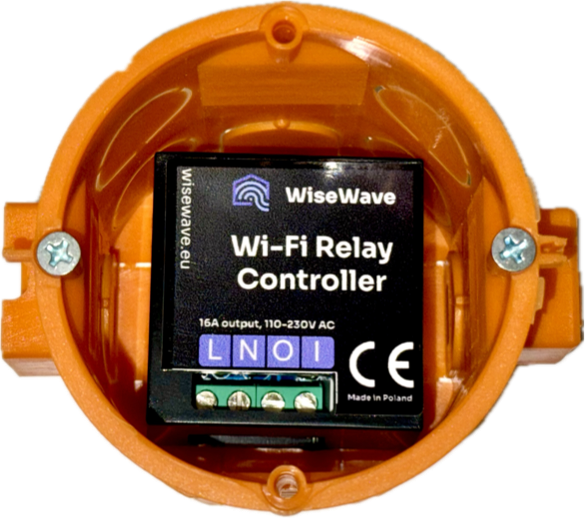
| Installation method | flush-mounted box |
| Length | 41.8 mm |
| Width | 41.8 mm |
| Height | 25.5 mm |
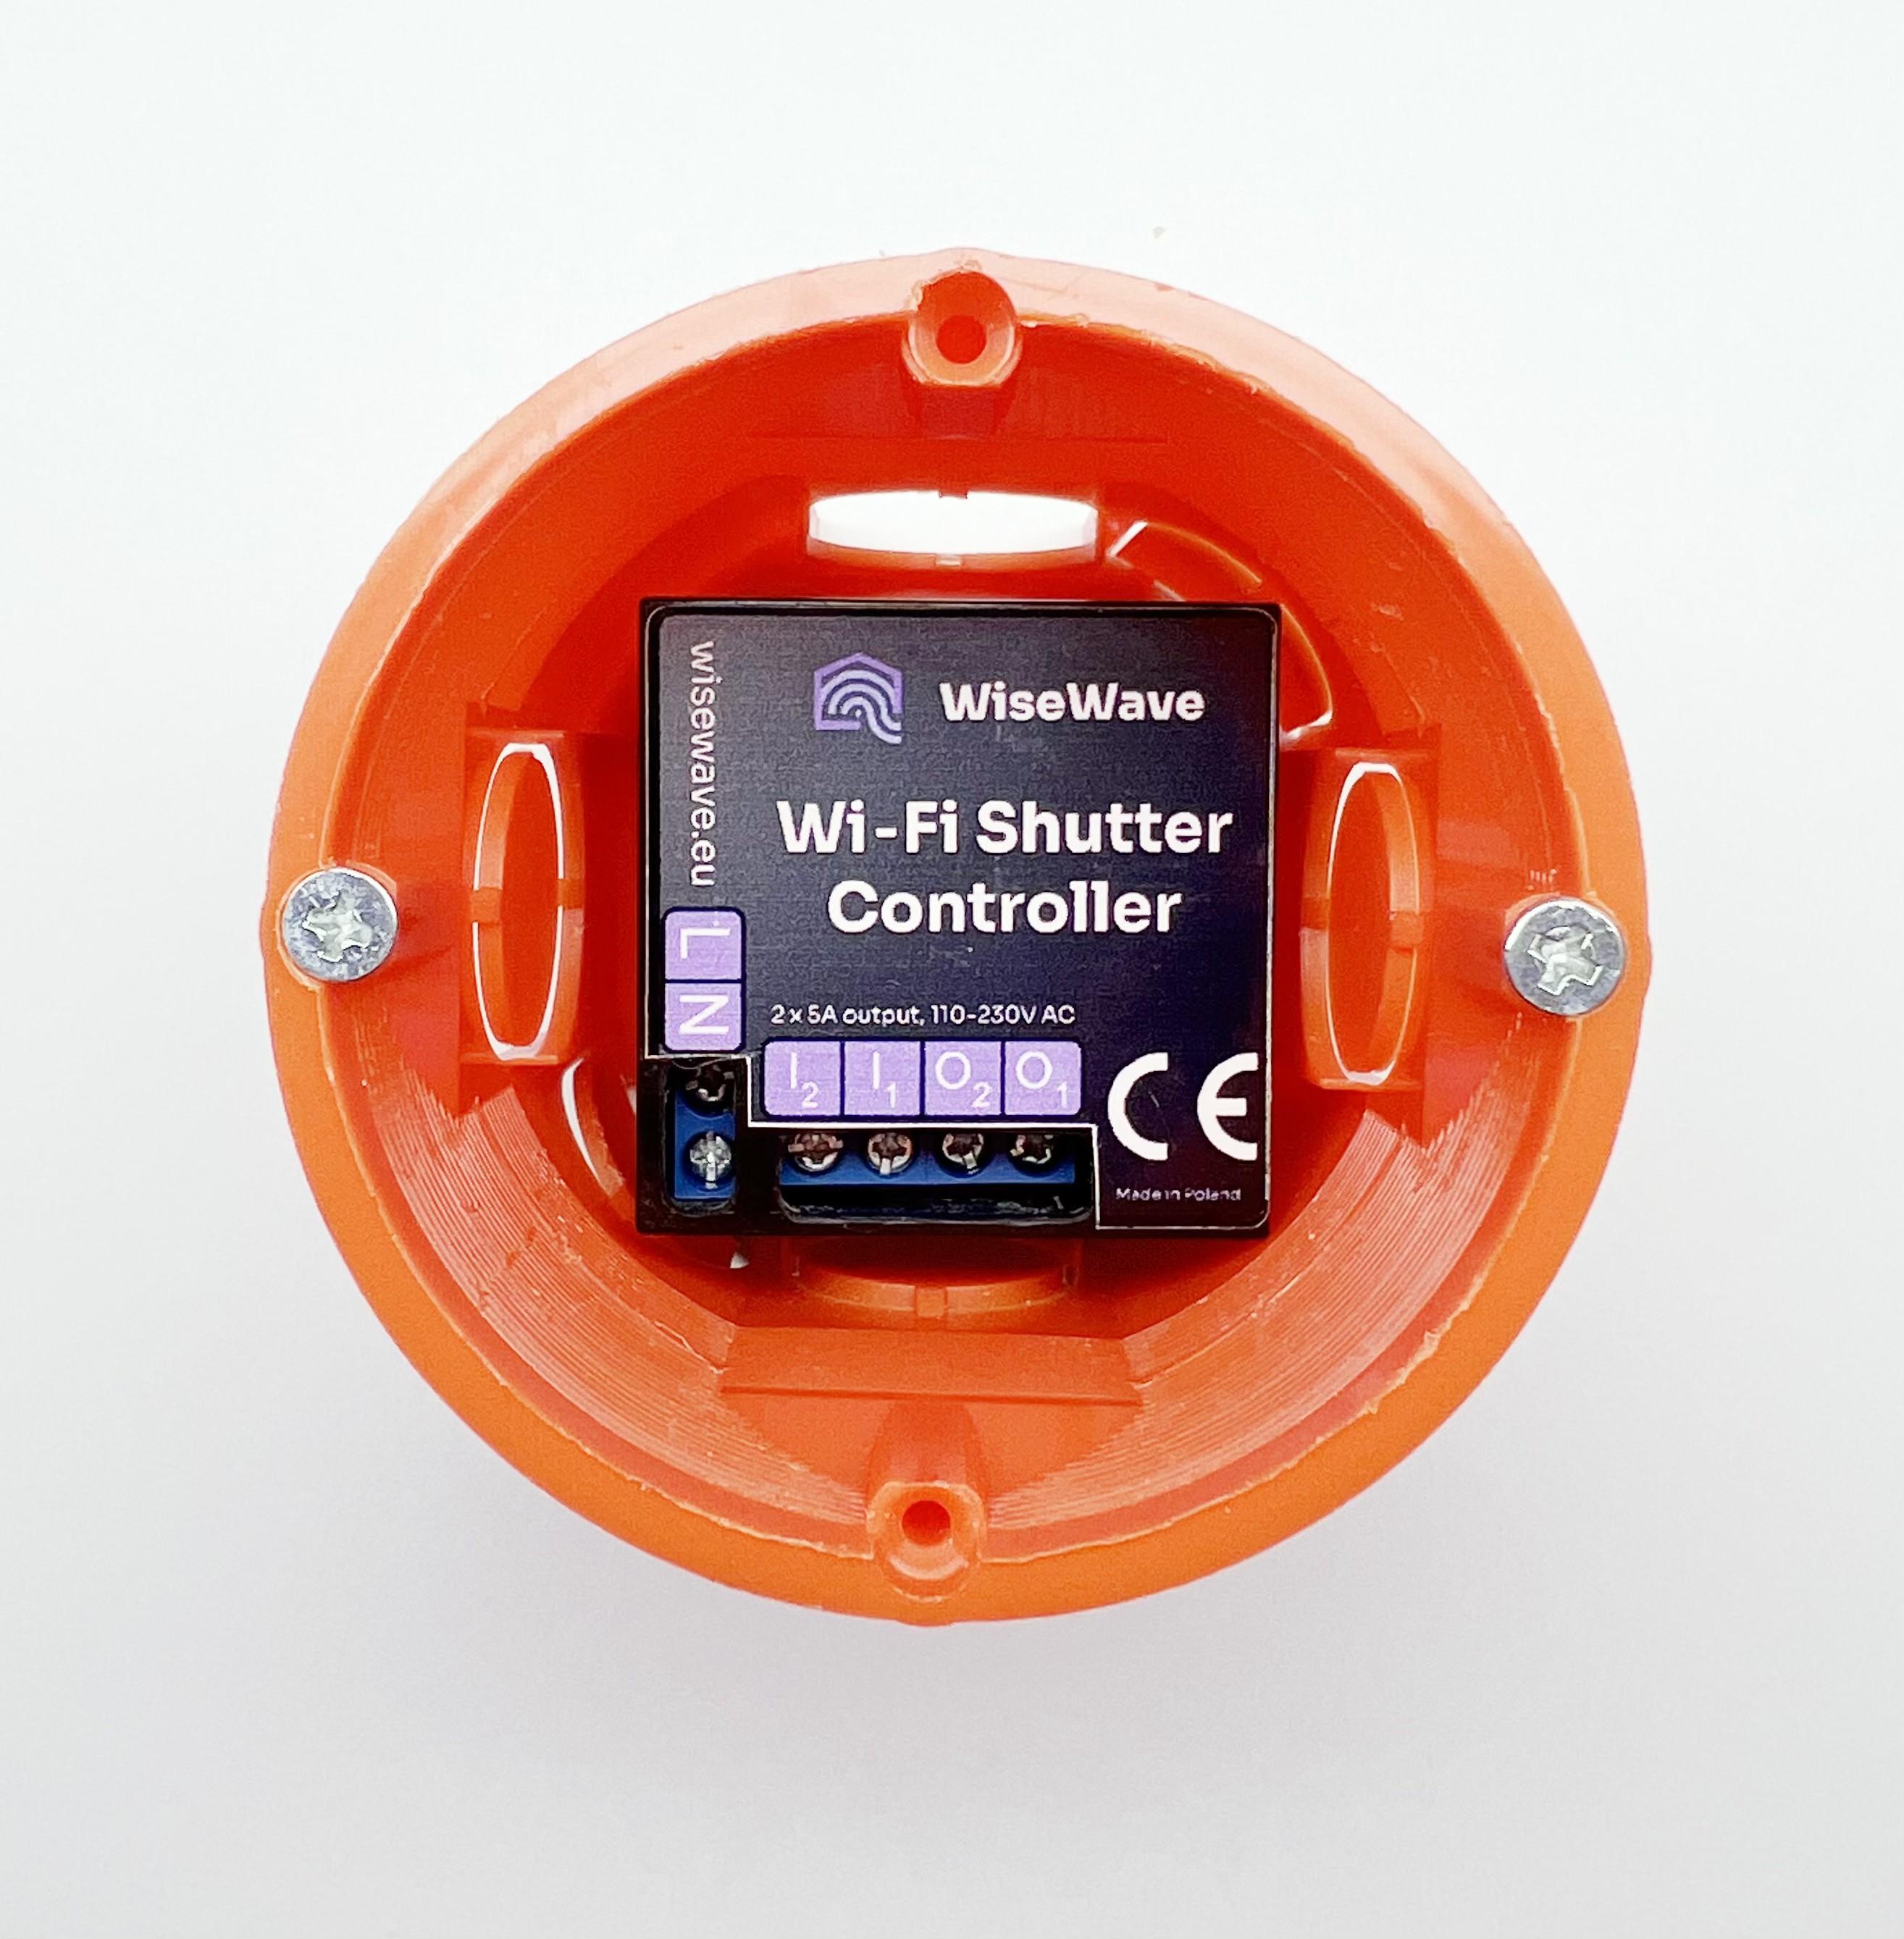
Wi-Fi Shutter Controller
Description
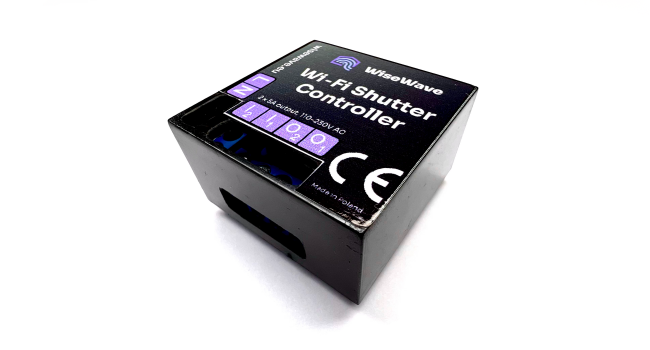
Wi-Fi Shutter Controller is – as the name suggests – an intelligent shutter controller.
You can control it using WiseWave app as well as
via inputs marked as I1 i I2, which allow you to expand or roll up the shutter.
Schematics
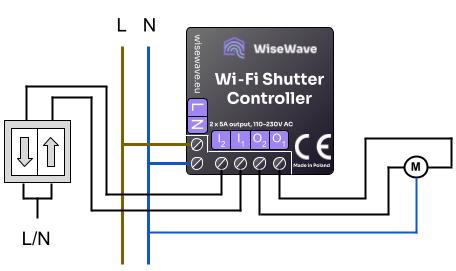
Connections and directions
| Connection | Direction |
|---|---|
| I1 | Input up |
| I2 | Input down |
| O1 | Shutter up |
| O2 | Shutter down |
Technical Specification
| Description | Value |
|---|---|
| Input voltage | 110 - 230 VAC |
| Power consumption | <1W |
| Type of outputs | Switch |
| Output voltage | Same as input voltage (110 - 230 VAC) |
| Max. output current | 5 A |
| Number of inputs | 2 |
| Type of inputs | Monostable (like doorbell) |
| Control signal | L or N |
| Wi-Fi | 802.11 b/g/n (2.4 GHz) |
| Installation method | flush-mounted box |
| Length | 41.8 mm |
| Width | 41.8 mm |
| Height | 25.5 mm |
Calibrate Shutter
Shutter requires calibration for remote control. Follow instructions described in Shutter Calibration section
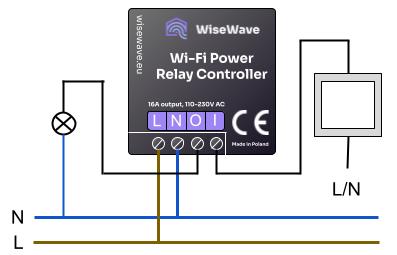
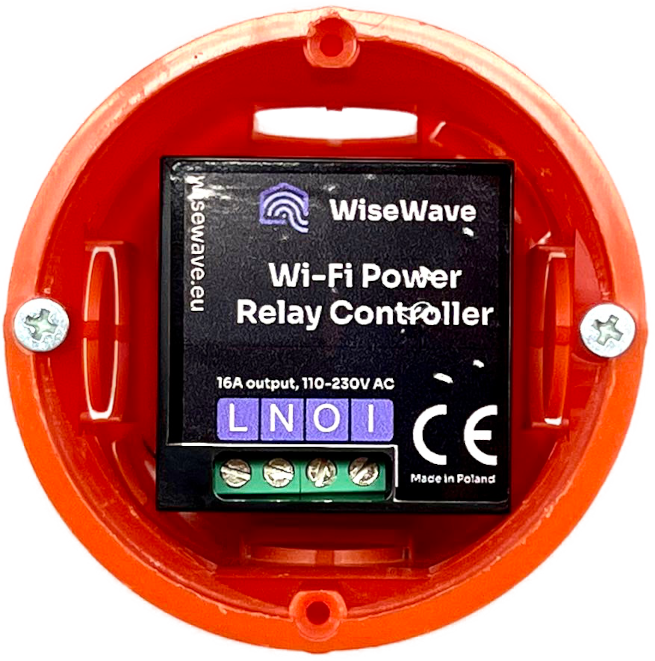
Wi-Fi Power Relay Controller

Description
Wi-Fi Power Relay Controller is an intelligent switch, allowing to control a device and measure its power usage.
You can control it using WiseWave app as well as
via input marked with I, which controls O output.
Schematics
Technical Specification
| Description | Value |
|---|---|
| Input voltage | 110 - 230 VAC |
| Power consumption | <1W |
| Number of outputs | 1 |
| Type of output | Relay |
| Max. output current | 16 A |
| Output voltage | Same as input voltage (110 - 230 VAC) |
| Number of inputs | 1 |
| Type of input | Bistable (ON/OFF) / Monostable (like doorbell) |
| Control signal | L or N |
| Wi-Fi | 802.11 b/g/n (2.4 GHz) |
| Installation method | flush-mounted box |
| Length | 41.8 mm |
| Width | 41.8 mm |
| Height | 25.5 mm |
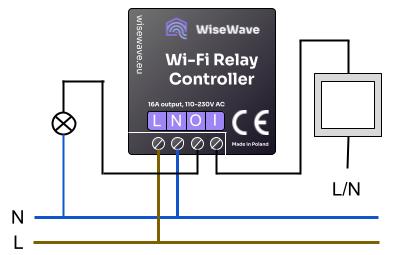
Wi-Fi Relay Controller
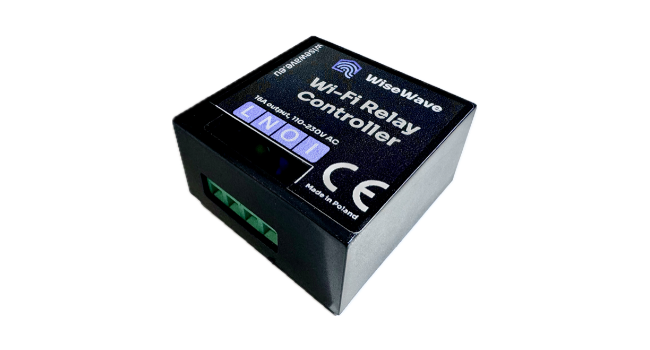
Description
Wi-Fi Relay Controller is an intelligent switch, allowing to control a single device.
You can control it using WiseWave app as well as
via input marked with I, which controls O output.
Schematics
Technical Specification
| Description | Value |
|---|---|
| Input voltage | 110 - 230 VAC |
| Power consumption | <1W |
| Number of outputs | 1 |
| Type of output | Relay |
| Max. output current | 16 A |
| Output voltage | Same as input voltage (110 - 230 VAC) |
| Number of inputs | 1 |
| Type of input | Bistable (ON/OFF) / Monostable (like doorbell) |
| Control signal | L or N |
| Wi-Fi | 802.11 b/g/n (2.4 GHz) |
| Installation method | flush-mounted box |
| Length | 41.8 mm |
| Width | 41.8 mm |
| Height | 25.5 mm |
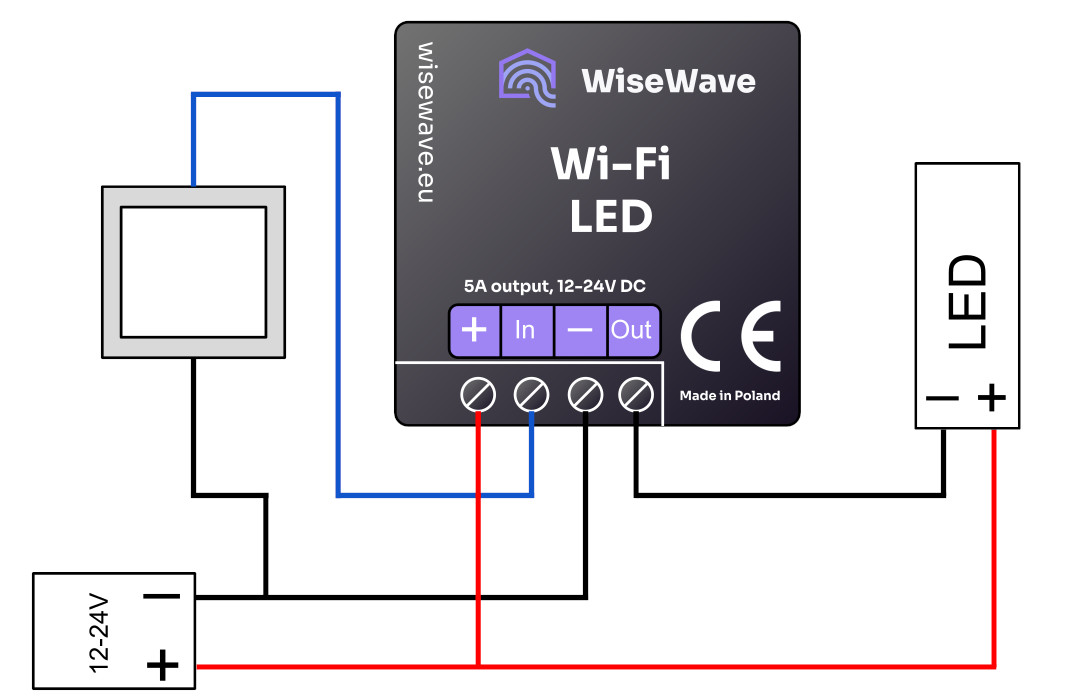
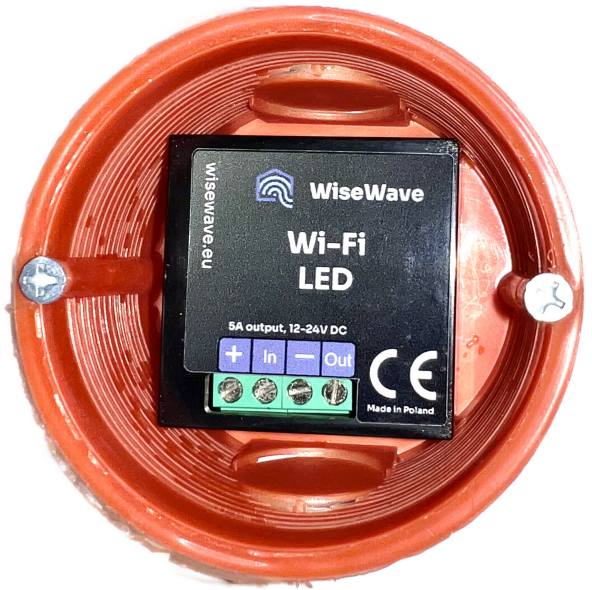
Wi-Fi LED
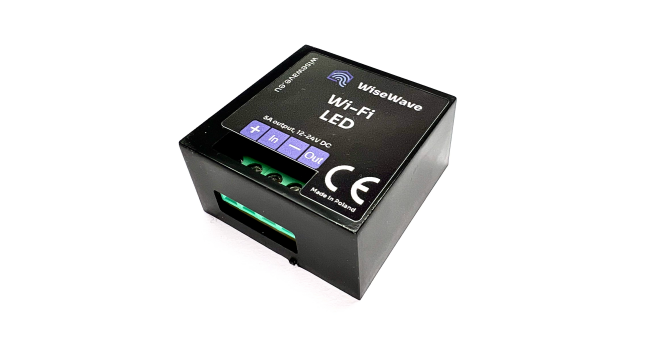
Description
Wi-Fi LED Controller is an intelligent LED controller, allowing to control a single-colour LED strip.
You can control it using WiseWave app as well as
via input marked with In, which controls Out output.
Schematics
Technical Specification
| Description | Value |
|---|---|
| Input voltage | 12 - 24 VDC |
| Power consumption | <1W |
| Number of outputs | 1 |
| Type of output | Analog |
| Max. output current | 5 A |
| Output voltage | Same as input voltage (12 - 24 VDC) |
| Number of inputs | 1 |
| Type of input | Bistable (ON/OFF) / Monostable (like doorbell) |
| Control signal | - (negative) |
| Wi-Fi | 802.11 b/g/n (2.4 GHz) |
| Installation method | flush-mounted box |
| Length | 41.8 mm |
| Width | 41.8 mm |
| Height | 21.5 mm |
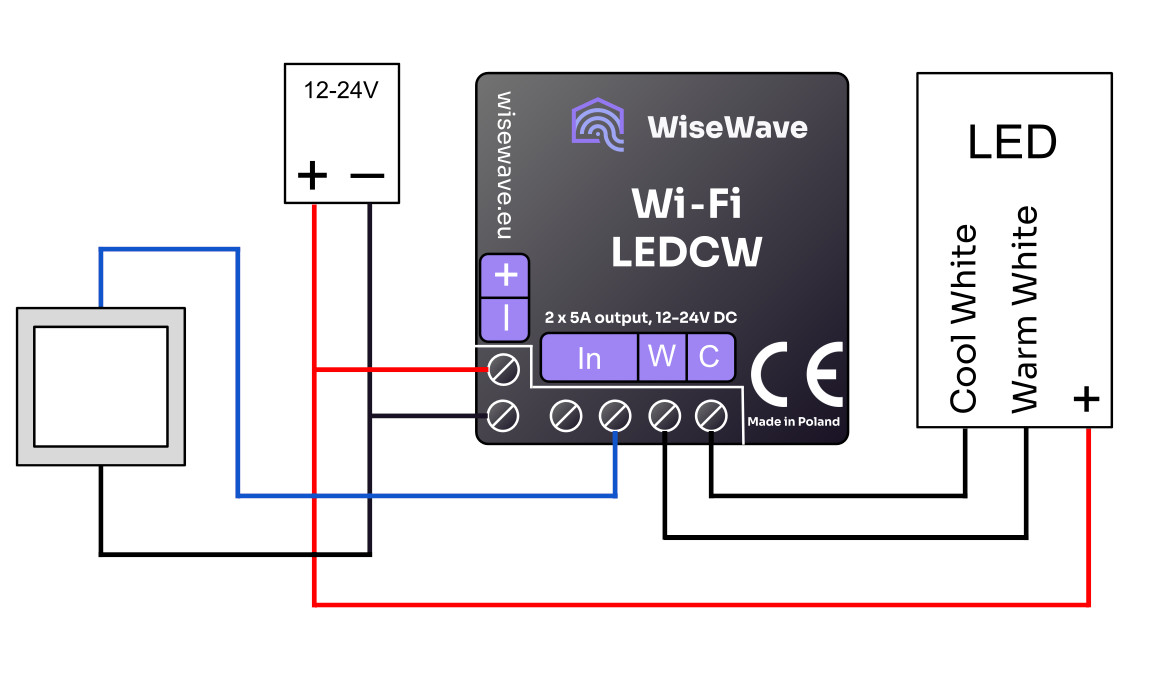
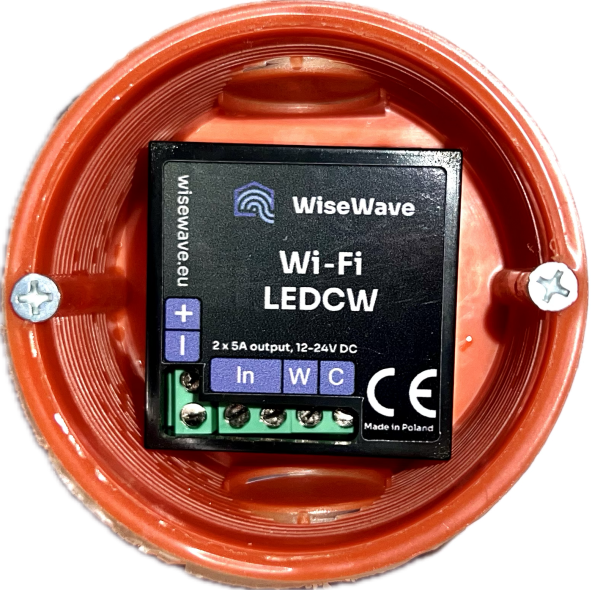
Wi-Fi LEDCW
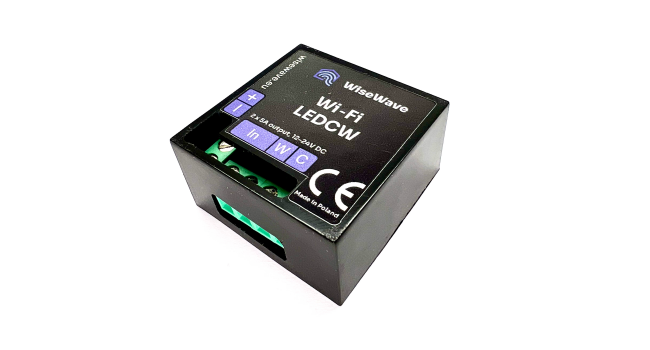
Description
Wi-Fi LEDCW Controller is an intelligent LED controller, allowing to control a LED strip with 2 colours
(cool white and warm white).
You can control it using WiseWave app as well as
via input marked with In, which can turn on or off both outputs.
Schematics
Technical Specification
| Description | Value |
|---|---|
| Input voltage | 12 - 24 VDC |
| Power consumption | <1W |
| Number of outputs | 2 (cool white, warm white) |
| Type of output | Analog |
| Max. output current | 5 A per output |
| Output voltage | Same as input voltage (12 - 24 VDC) |
| Number of inputs | 1 |
| Type of input | Bistable (ON/OFF) / Monostable (like doorbell) |
| Control signal | - (negative) |
| Wi-Fi | 802.11 b/g/n (2.4 GHz) |
| Installation method | flush-mounted box |
| Length | 41.8 mm |
| Width | 41.8 mm |
| Height | 21.5 mm |
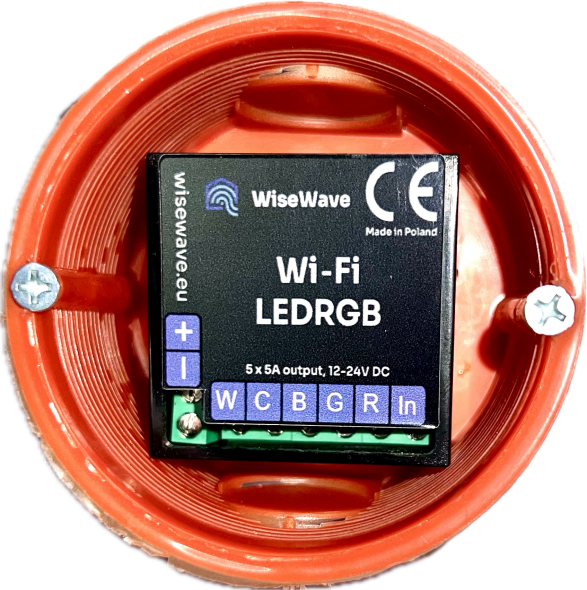
Wi-Fi LEDRGB
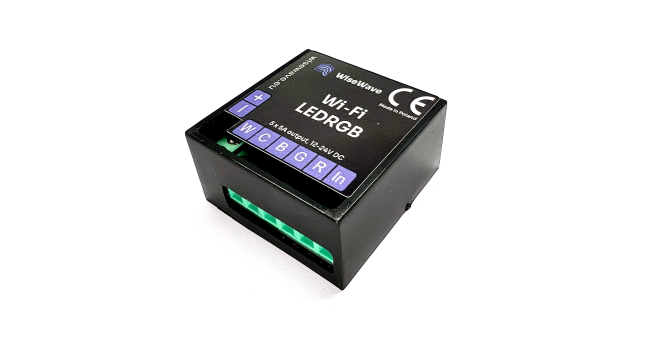
Description
Wi-Fi LEDRGB Controller is an intelligent LED controller, allowing to control a LED strip with 5 colours
(red, green, blue, cool white, warm white).
You can control it using WiseWave app as well as
via input marked with In, which can turn on or off all 5 outputs.
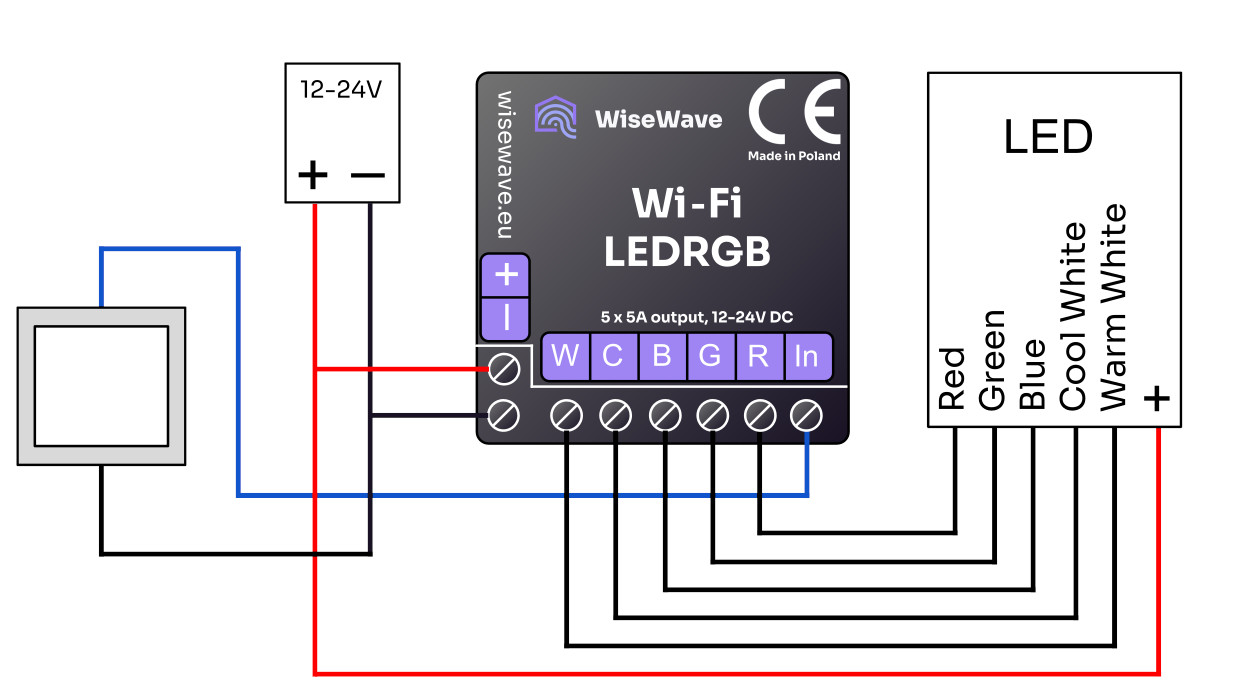
Schematics
Technical Specification
| Description | Value |
|---|---|
| Input voltage | 12 - 24 VDC |
| Power consumption | <1W |
| Number of outputs | 5 (red, green, blue, cool white, warm white) |
| Type of output | Analog |
| Max. output current | 4 A per output |
| Output voltage | Same as input voltage (12 - 24 VDC) |
| Number of inputs | 1 |
| Type of input | Bistable (ON/OFF) / Monostable (like doorbell) |
| Control signal | - (negative) |
| Wi-Fi | 802.11 b/g/n (2.4 GHz) |
| Installation method | flush-mounted box |
| Length | 41.8 mm |
| Width | 41.8 mm |
| Height | 21.5 mm |
Wi-Fi Temperature & Humidity Sensor
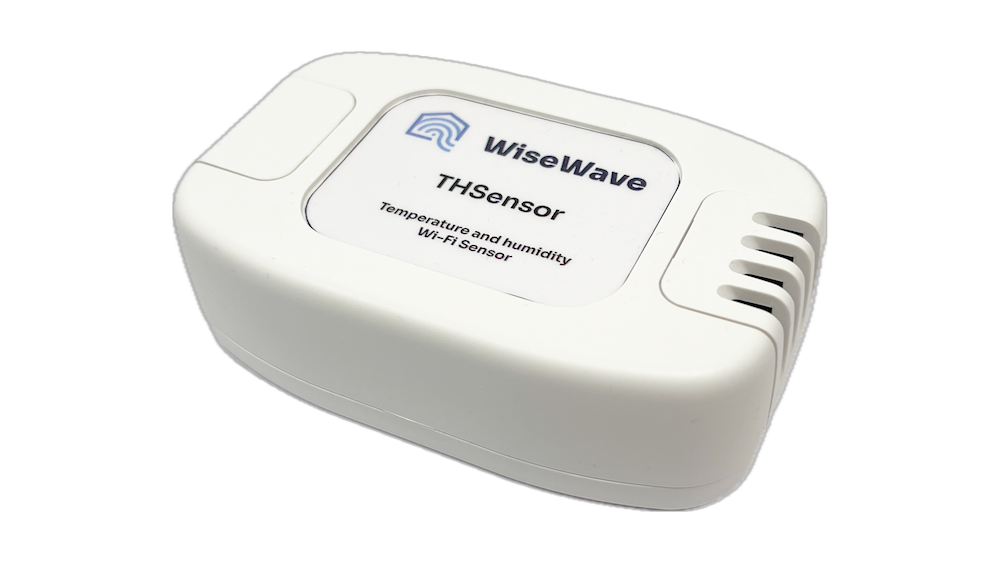
Description
Wi-Fi Temperature & Humidity Sensor allows to view current and past temperature and humidity measurements via the WiseWave app.
Technical specification
| Description | Value |
|---|---|
| Input voltage | 5V DC (USB-C) |
| Power consumption | <1W |
| Wi-Fi | 802.11 b/g/n (2.4 GHz) |
| Length | 110.0 mm |
| Width | 70.0 mm |
| Height | 33.0 mm |
WiseWave App - Your Control Centre
WiseWave app allows you to control WiseWave devices using your smartphone.
We designed our system with speed and security as our priority.
Inside your home network, the application enables quick and direct control of your devices.
WiseWave app ensures secure encrypted communication via the Internet. During devices' loading animation, the app instantiates secure connection.
To control your devices via the Internet (from outside your local network) you need to create an account. To learn more, go to Account and Sharing.
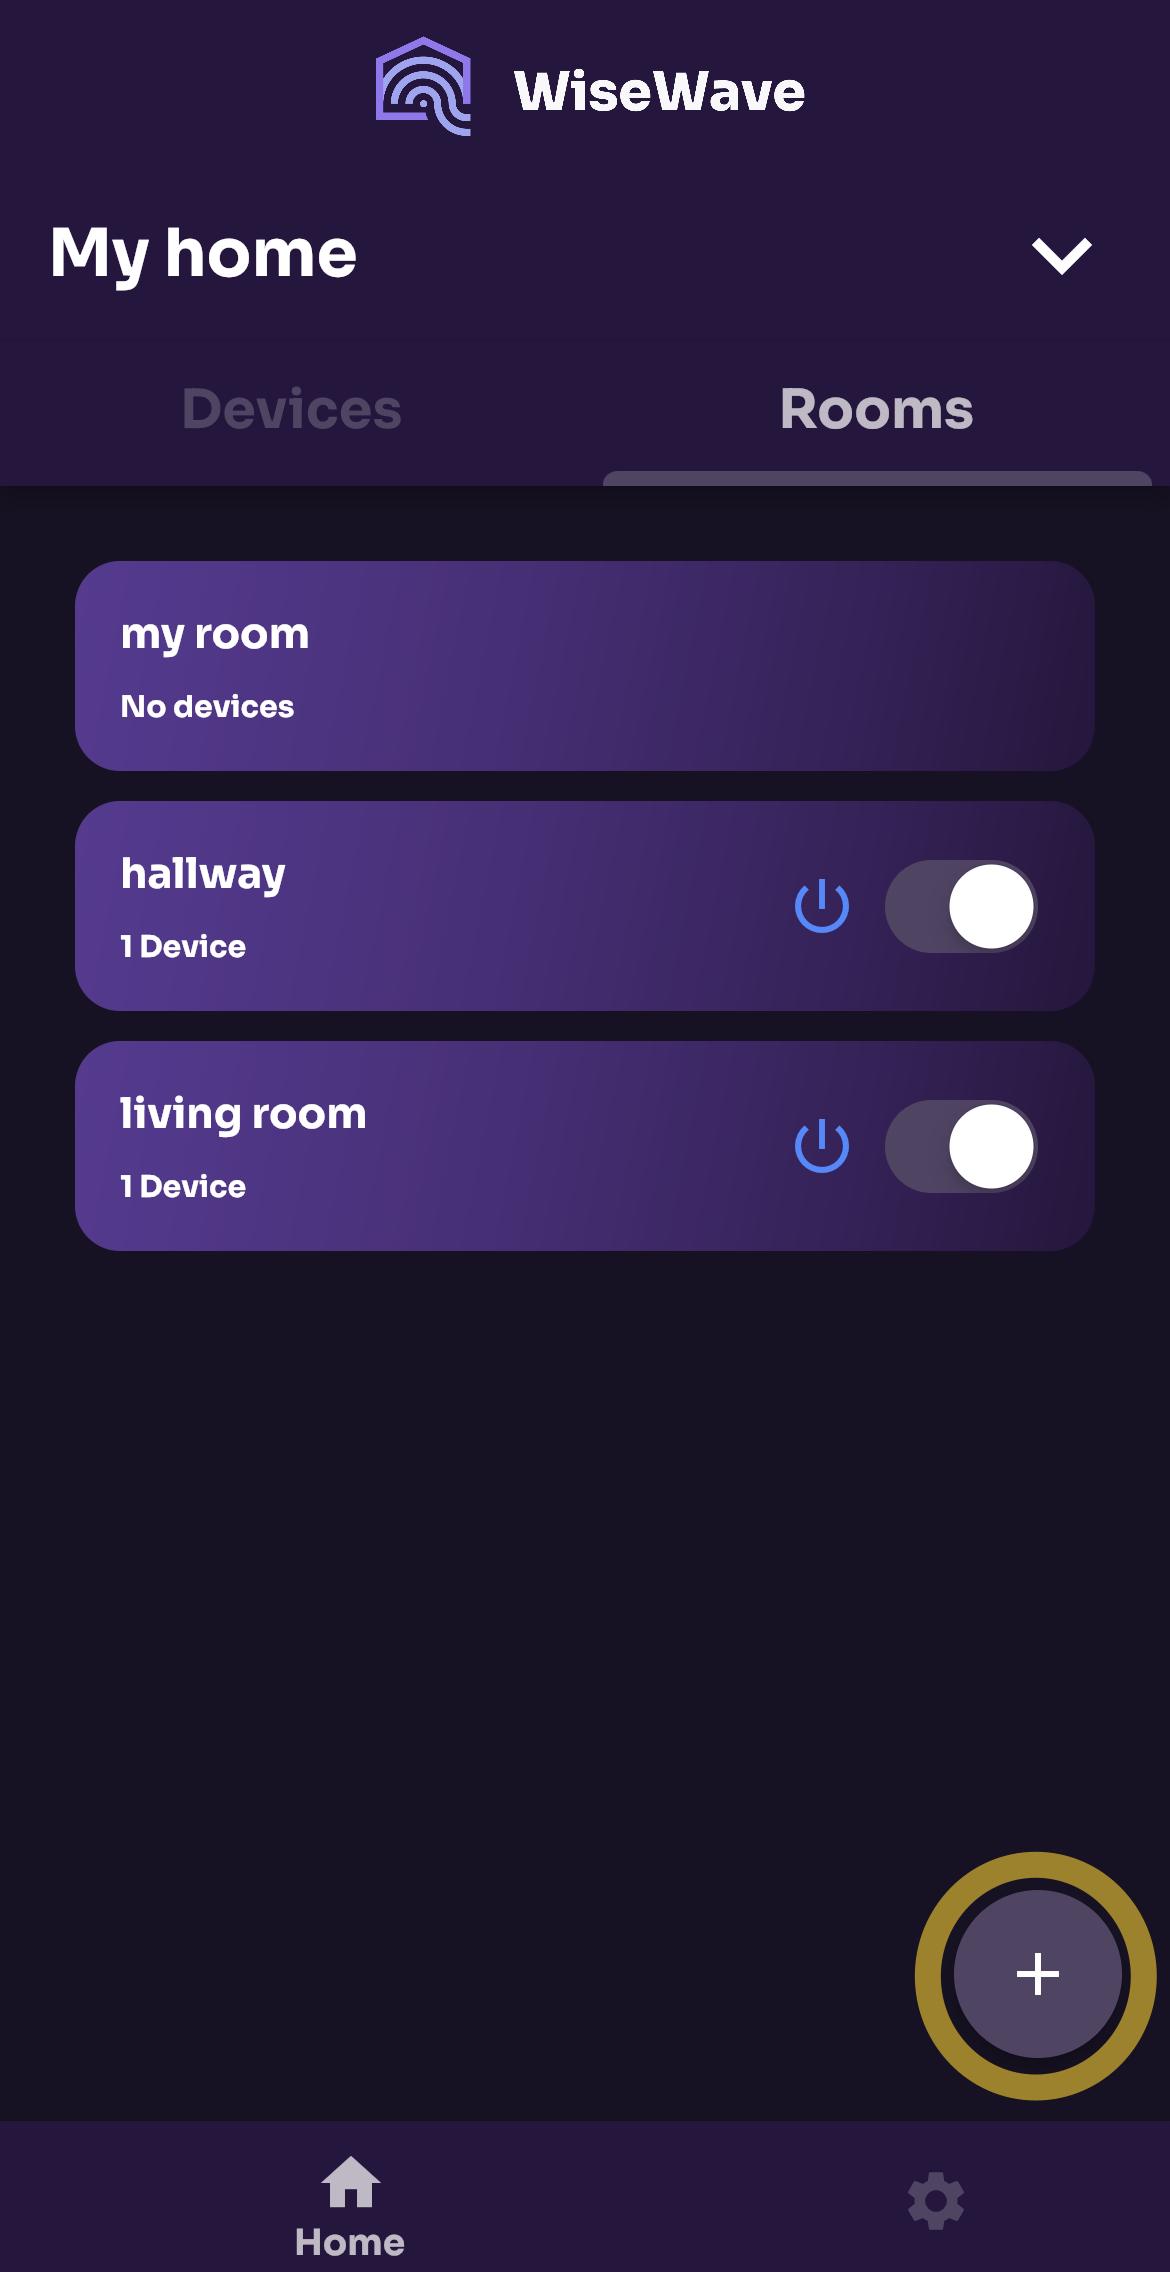
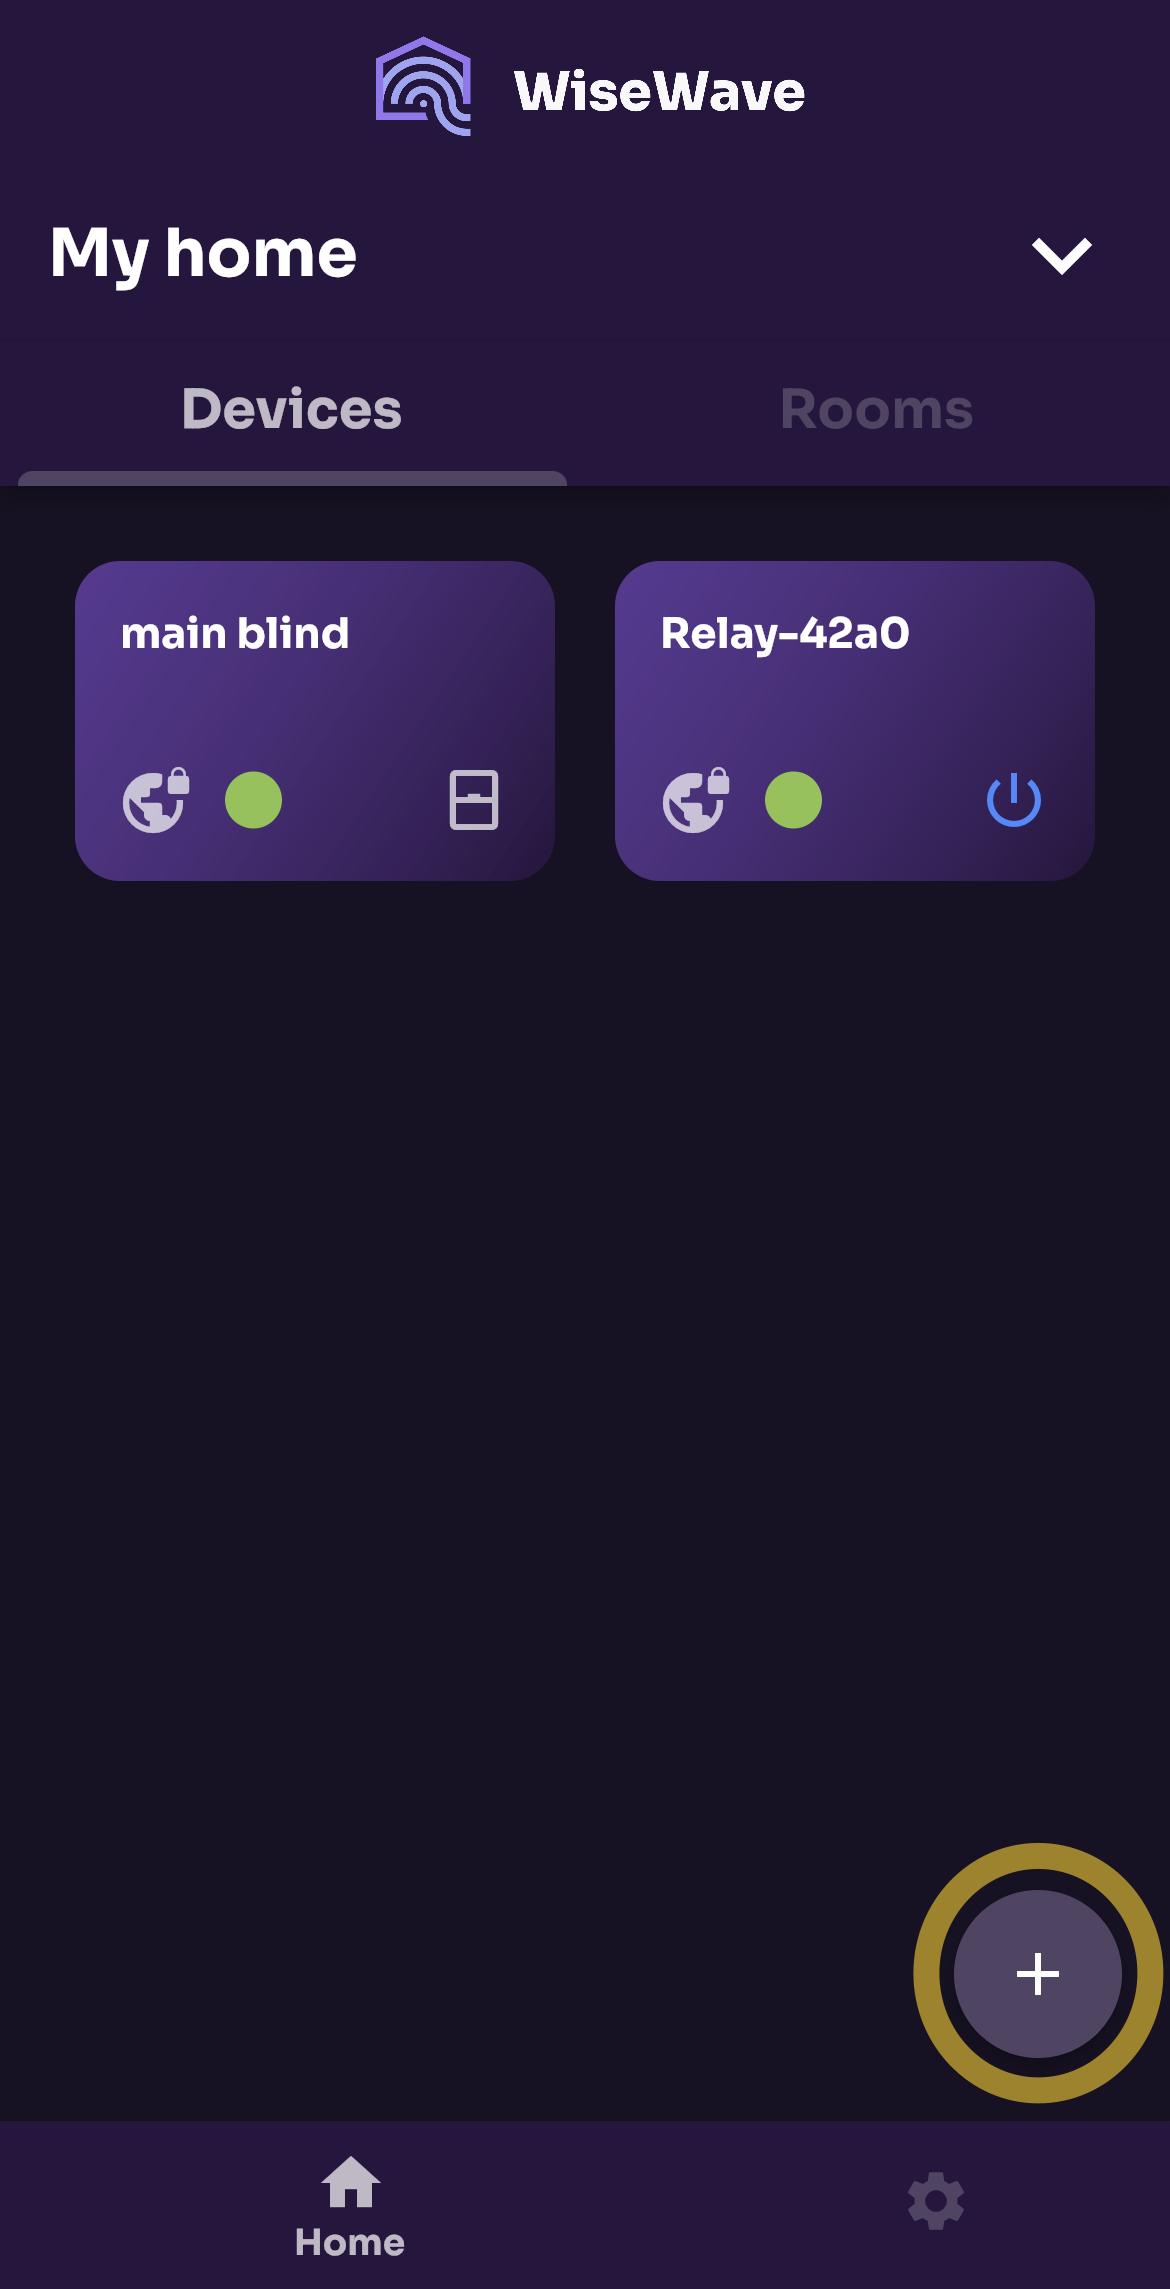
Main Screen
On the main screen you can see
- home selection dropdown menu
- two tabs:
- tab on the left-hand side shows all devices in selected home,
- tab on the right-hand side shows defined rooms (groups of devices).
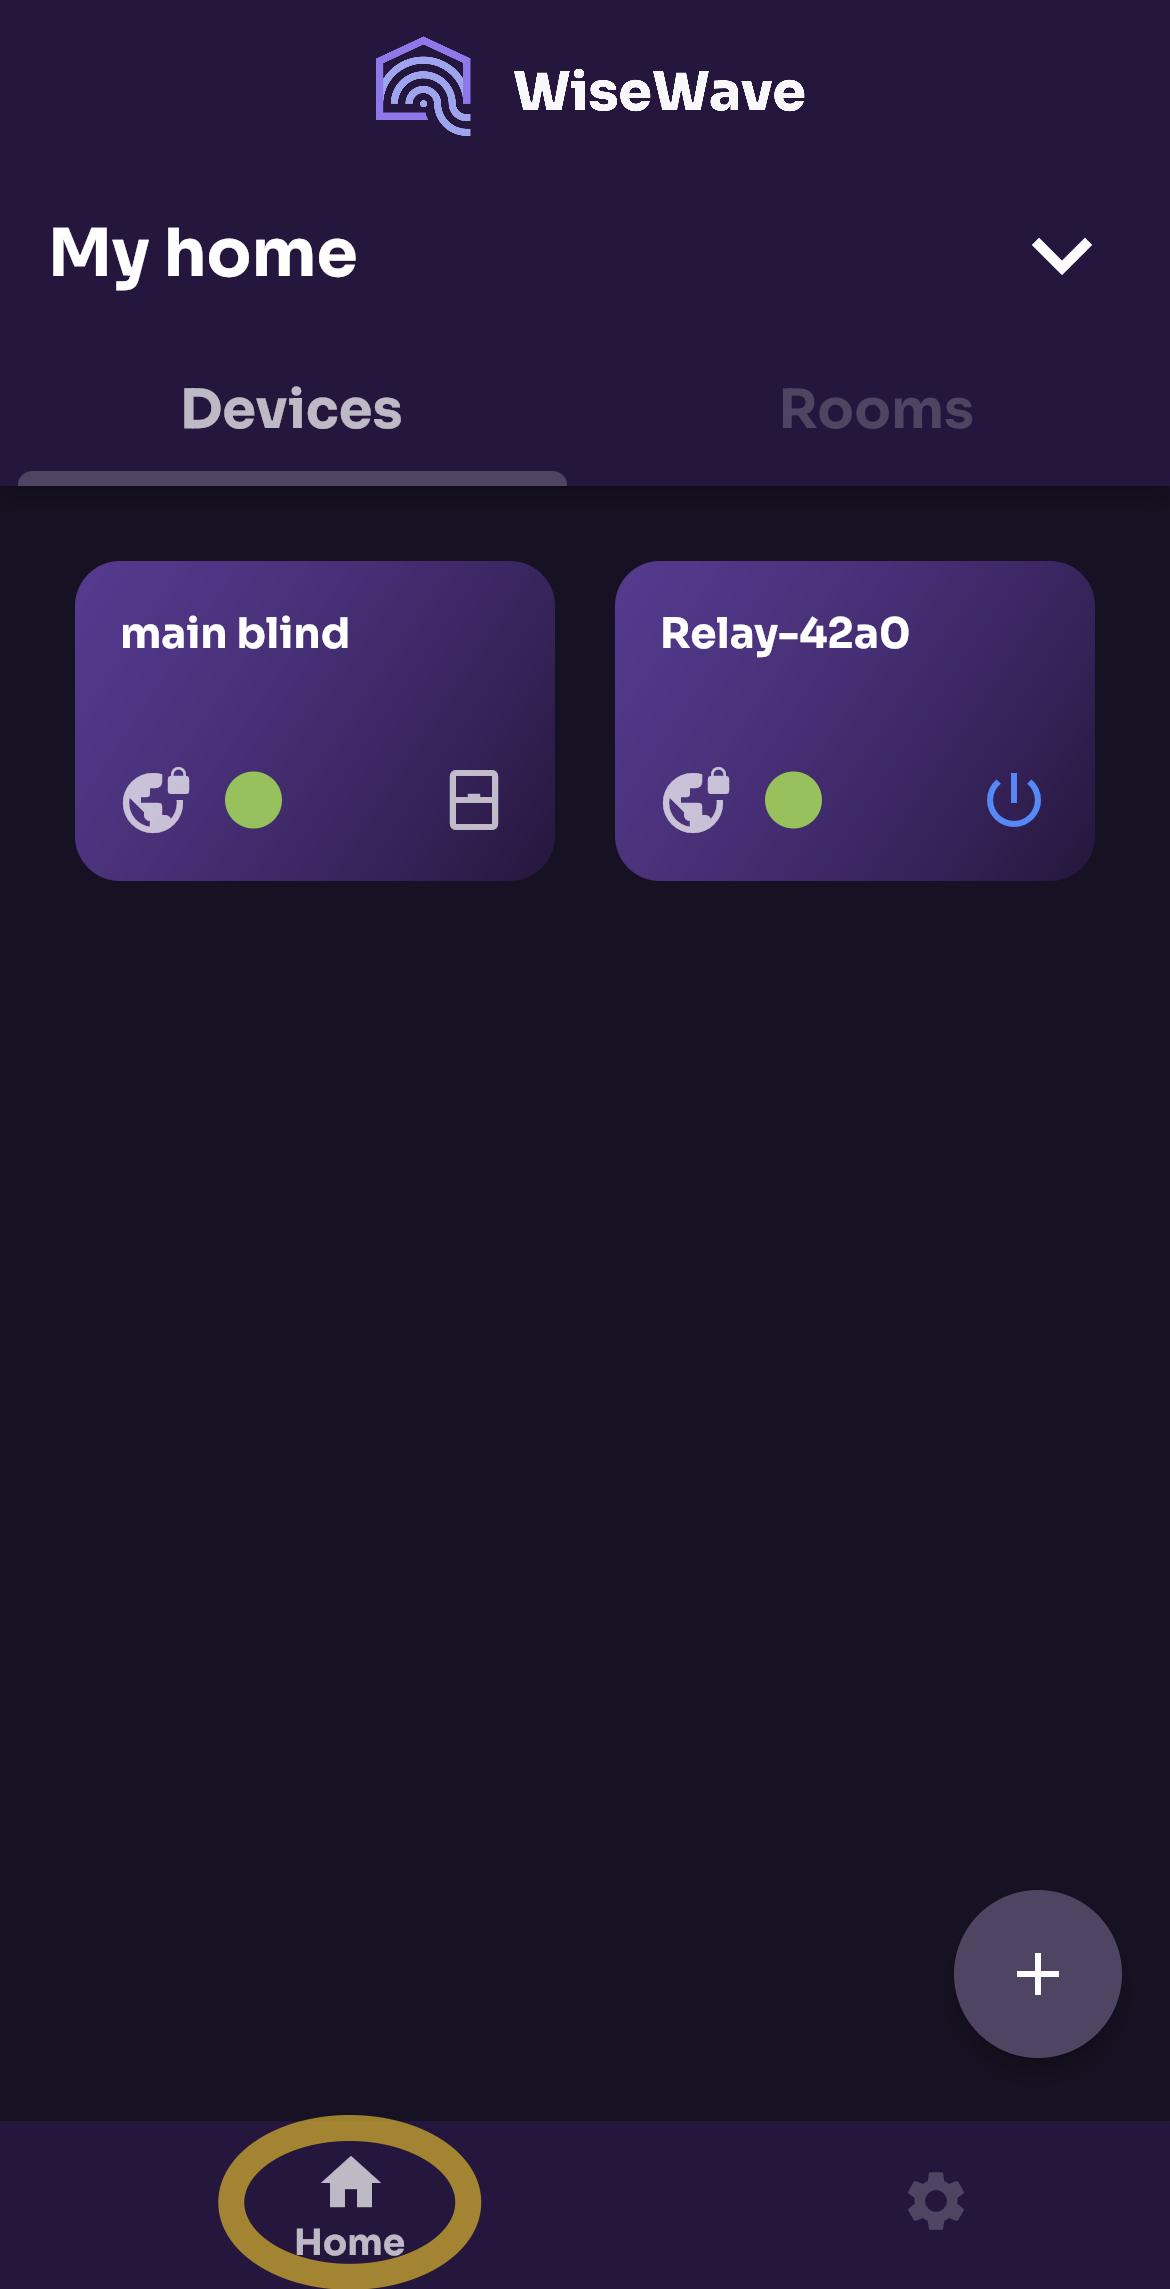
You can group devices into rooms and control all of them with one press of a button.
Home Management
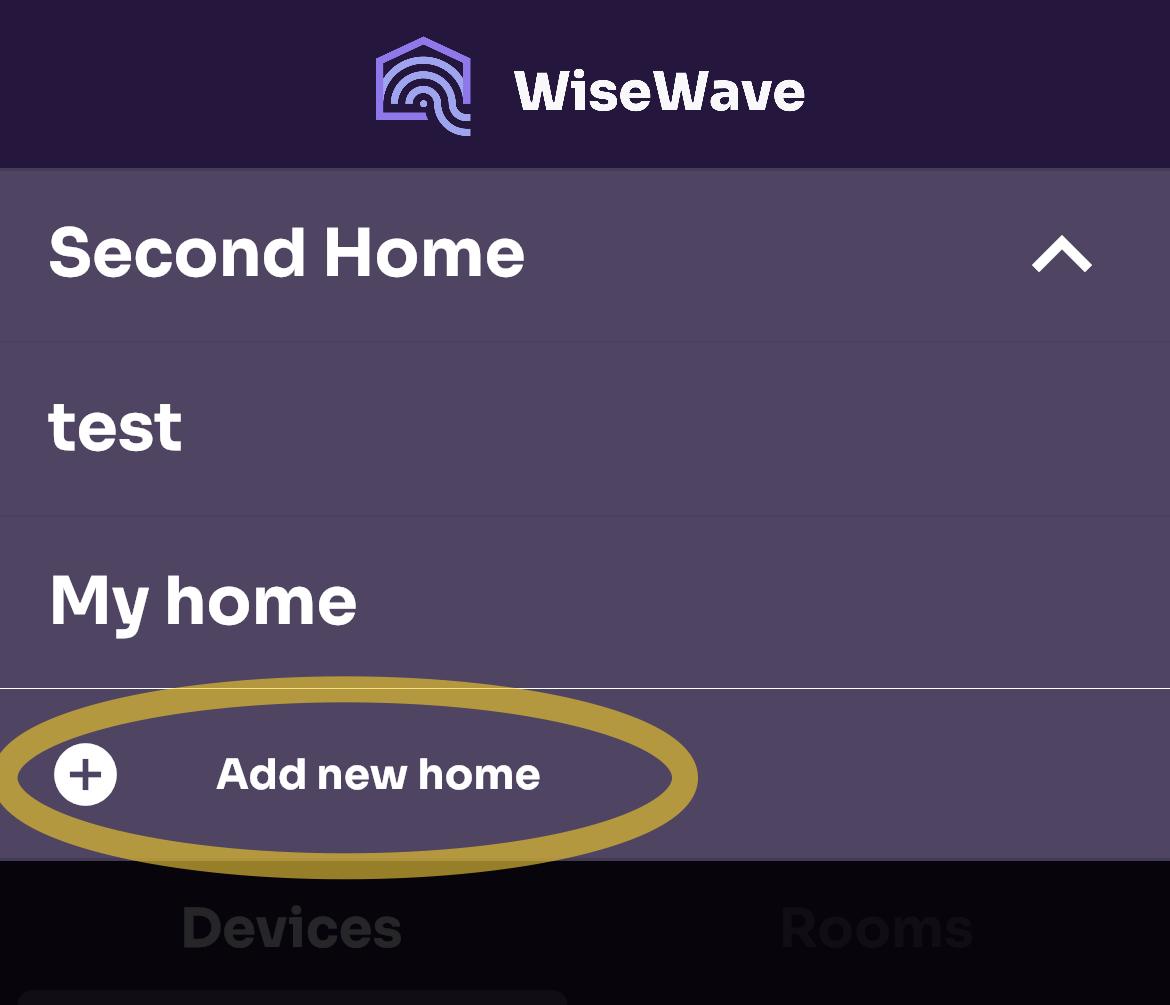
Add a Home
Just after launching the app, it will ask you to name your first home. To add another home, expand the drop-down list and press Add new home.
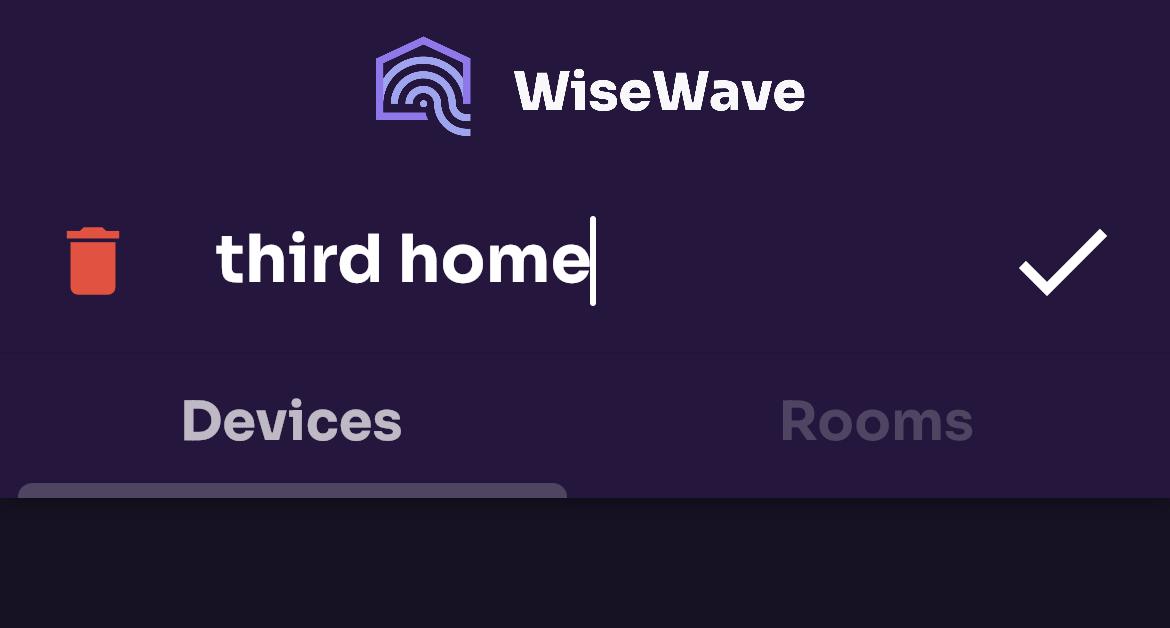
Edit and Remove Home
-
To edit a name of a home, press and hold the name of the home while the drop-down list is collapsed.
-
To remove home, press red icon on the left side of home name.
Note: you can only edit or remove homes that you created. You cannot edit home that was shared with you. To leave a home that was shared with you, follow instructions described in
Account and Sharing section.
Room Management
Rooms are used to group your devices together in a house. Adding devices to rooms allows you to control several devices at the same time with one click.
Add a New Room
To add a room, go to Rooms tab on the main screen and press button
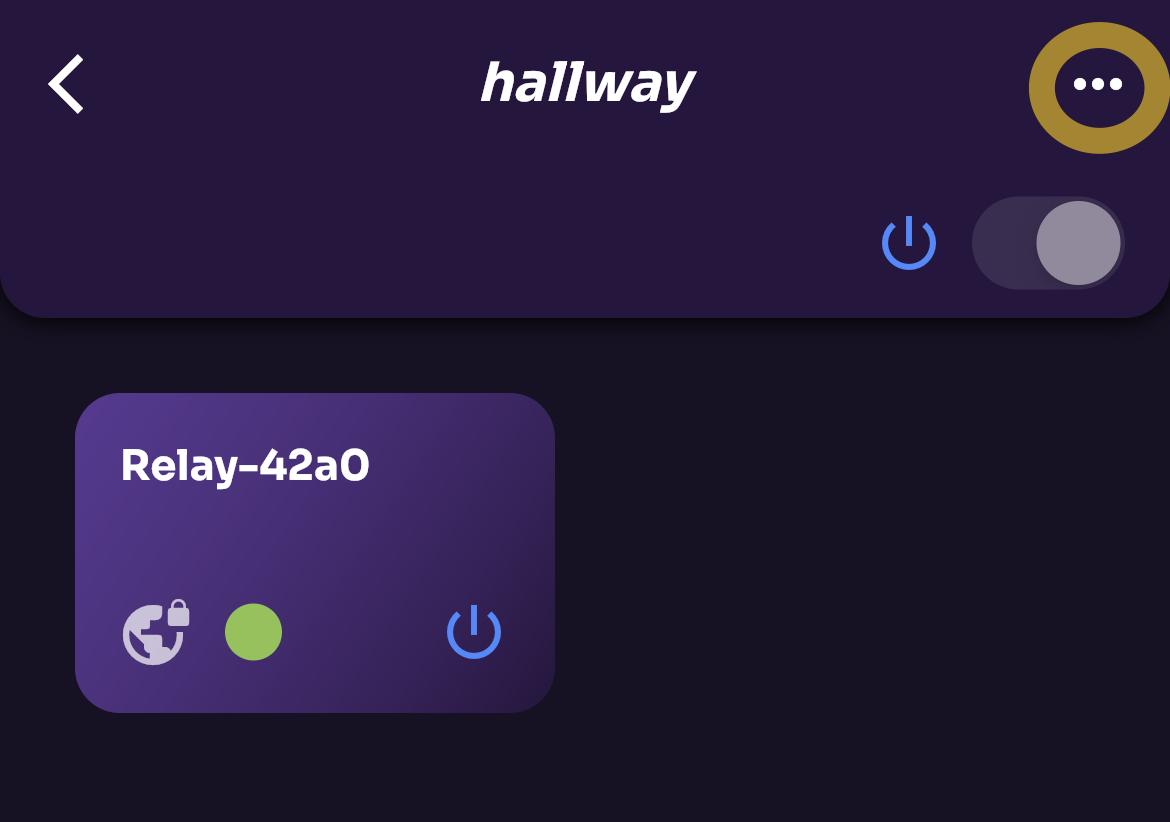
Edit a Name of a Room and Remove a Room
If you press a card with a room name, you will be presented with a list of devices in the room. You can edit a name or remove the room by pressing more button on the top right of the screen.
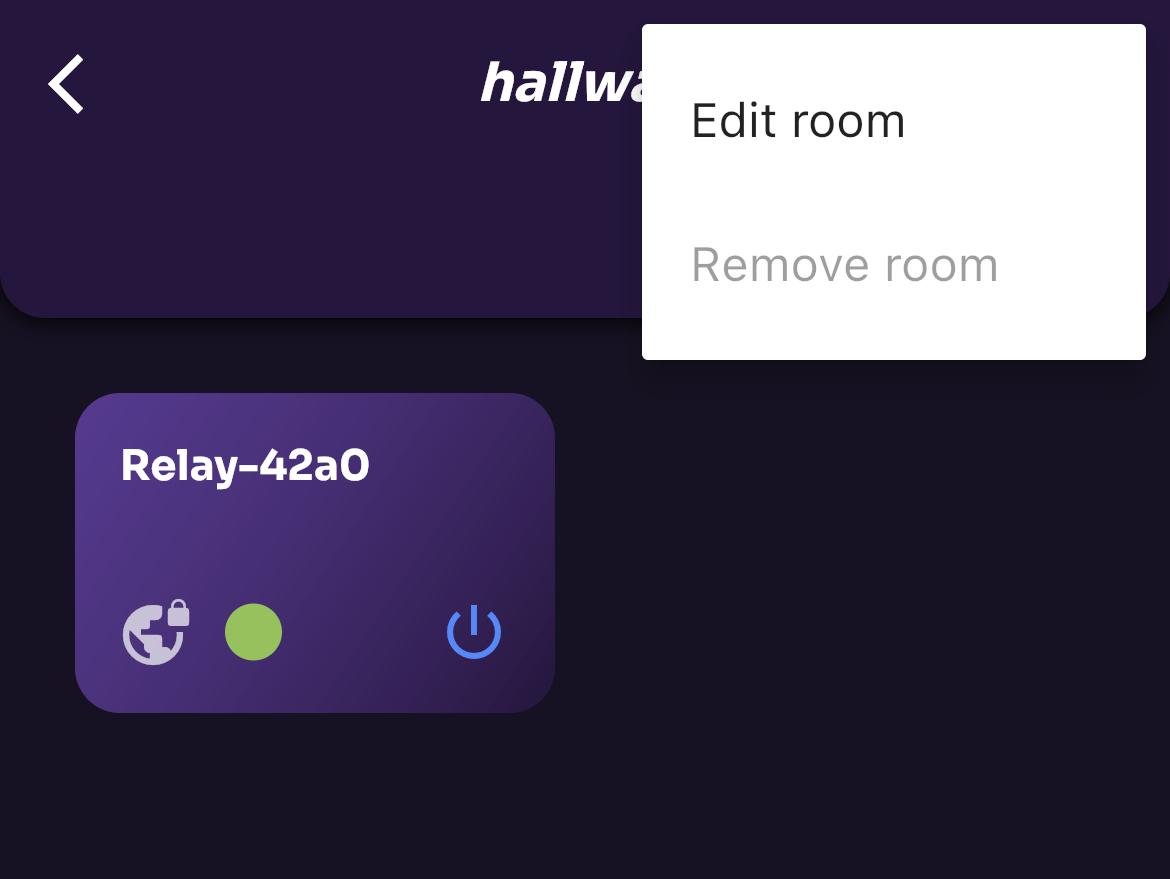
Note: you can only remove a room with no devices in it.
Group Control
A switch that allows you to control all devices in the room is located under the drop-down menu. This switch is also located on each tile on the list of all rooms. With that, you can control devices in the room without the need to enter the list of devices in the room.
State description explanation of relay devices:
- On means that at least one device in the room is turned on.
- Off means that all devices in the room are turned off.
Control explanation of relay devices:
- Switching to On turns on all devices.
- Switchig to OFF turns off all devices.
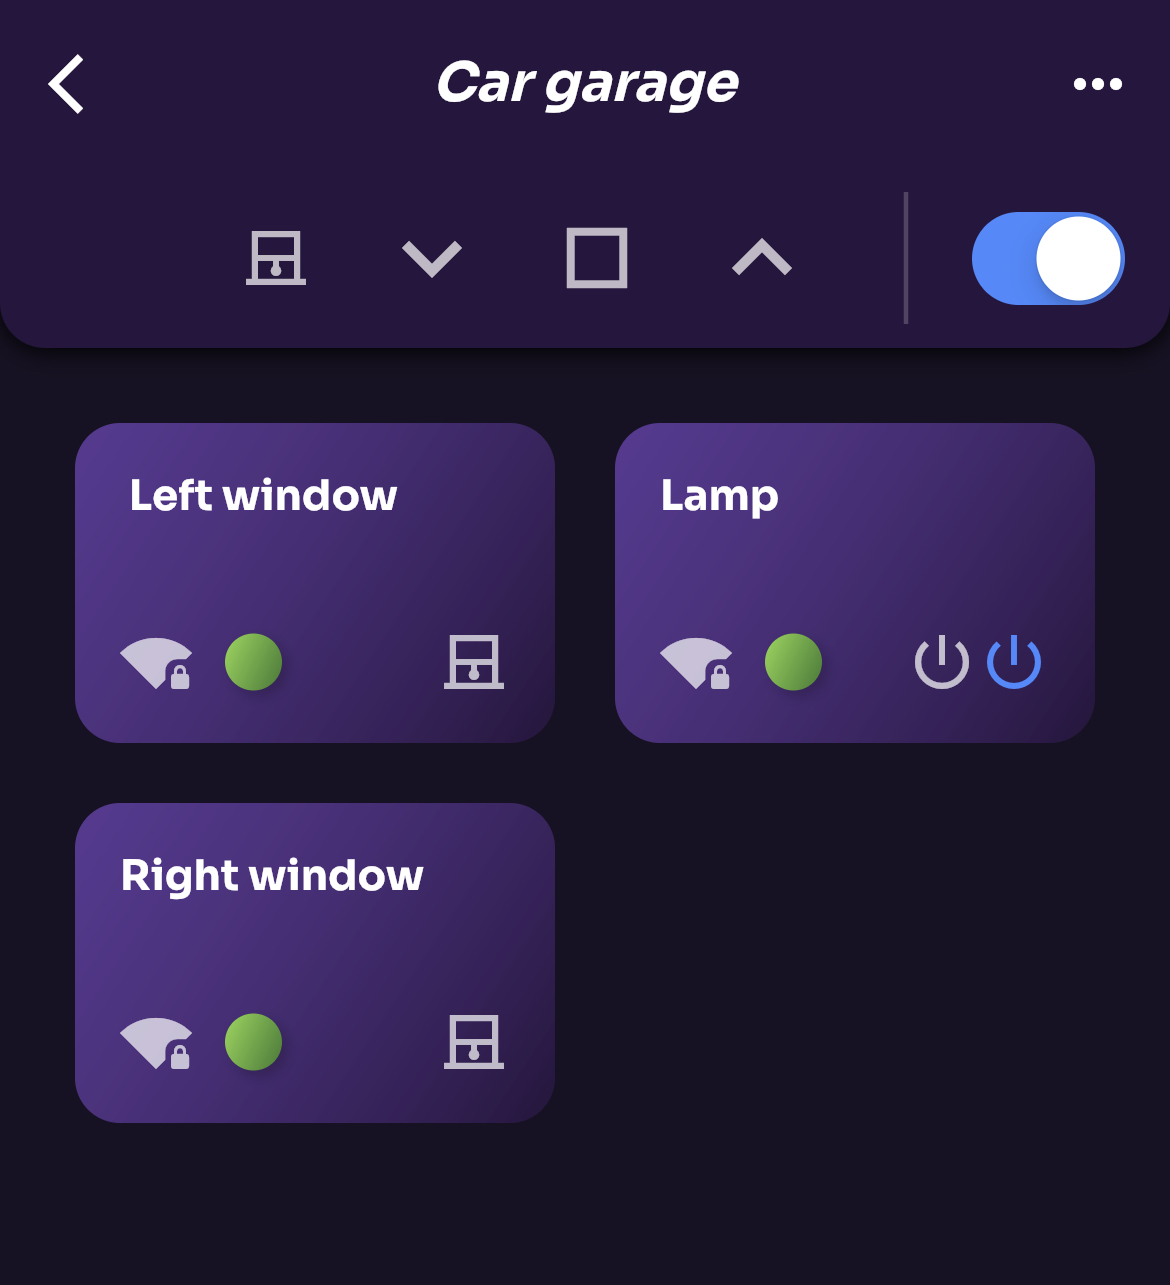
State description of shutter controllers:
- means that at least one shutter in room is closed.
- means that at least one shutter is partially opened.
- means that every roller shutter in the room is opened.
When there is at least one roller shutter controller in the room, the application allows for separate group control of roller shutters.
Device's Control
This section describes interactions with a device
Pairing
To pair a device, press in Devices tab on the main screen.
Note: to find your devices, you need to first connect them to your Wi-Fi network, see Device management
The WiseWave app will search for unpaired devices in your local Wi-Fi network and show them on a list. Searching process may take a couple of seconds.
Select a device you want to pair. Pairing process may take a couple of seconds.
During pairing, WiseWave app sets up a location and timezone on the module. These are required for scheduling feature to work correctly. To know more, go to Schedule.
Note: To pair a device you need to have an internet connection.
Control Screen
If you press on the device tile, you will be taken to the device control screen.
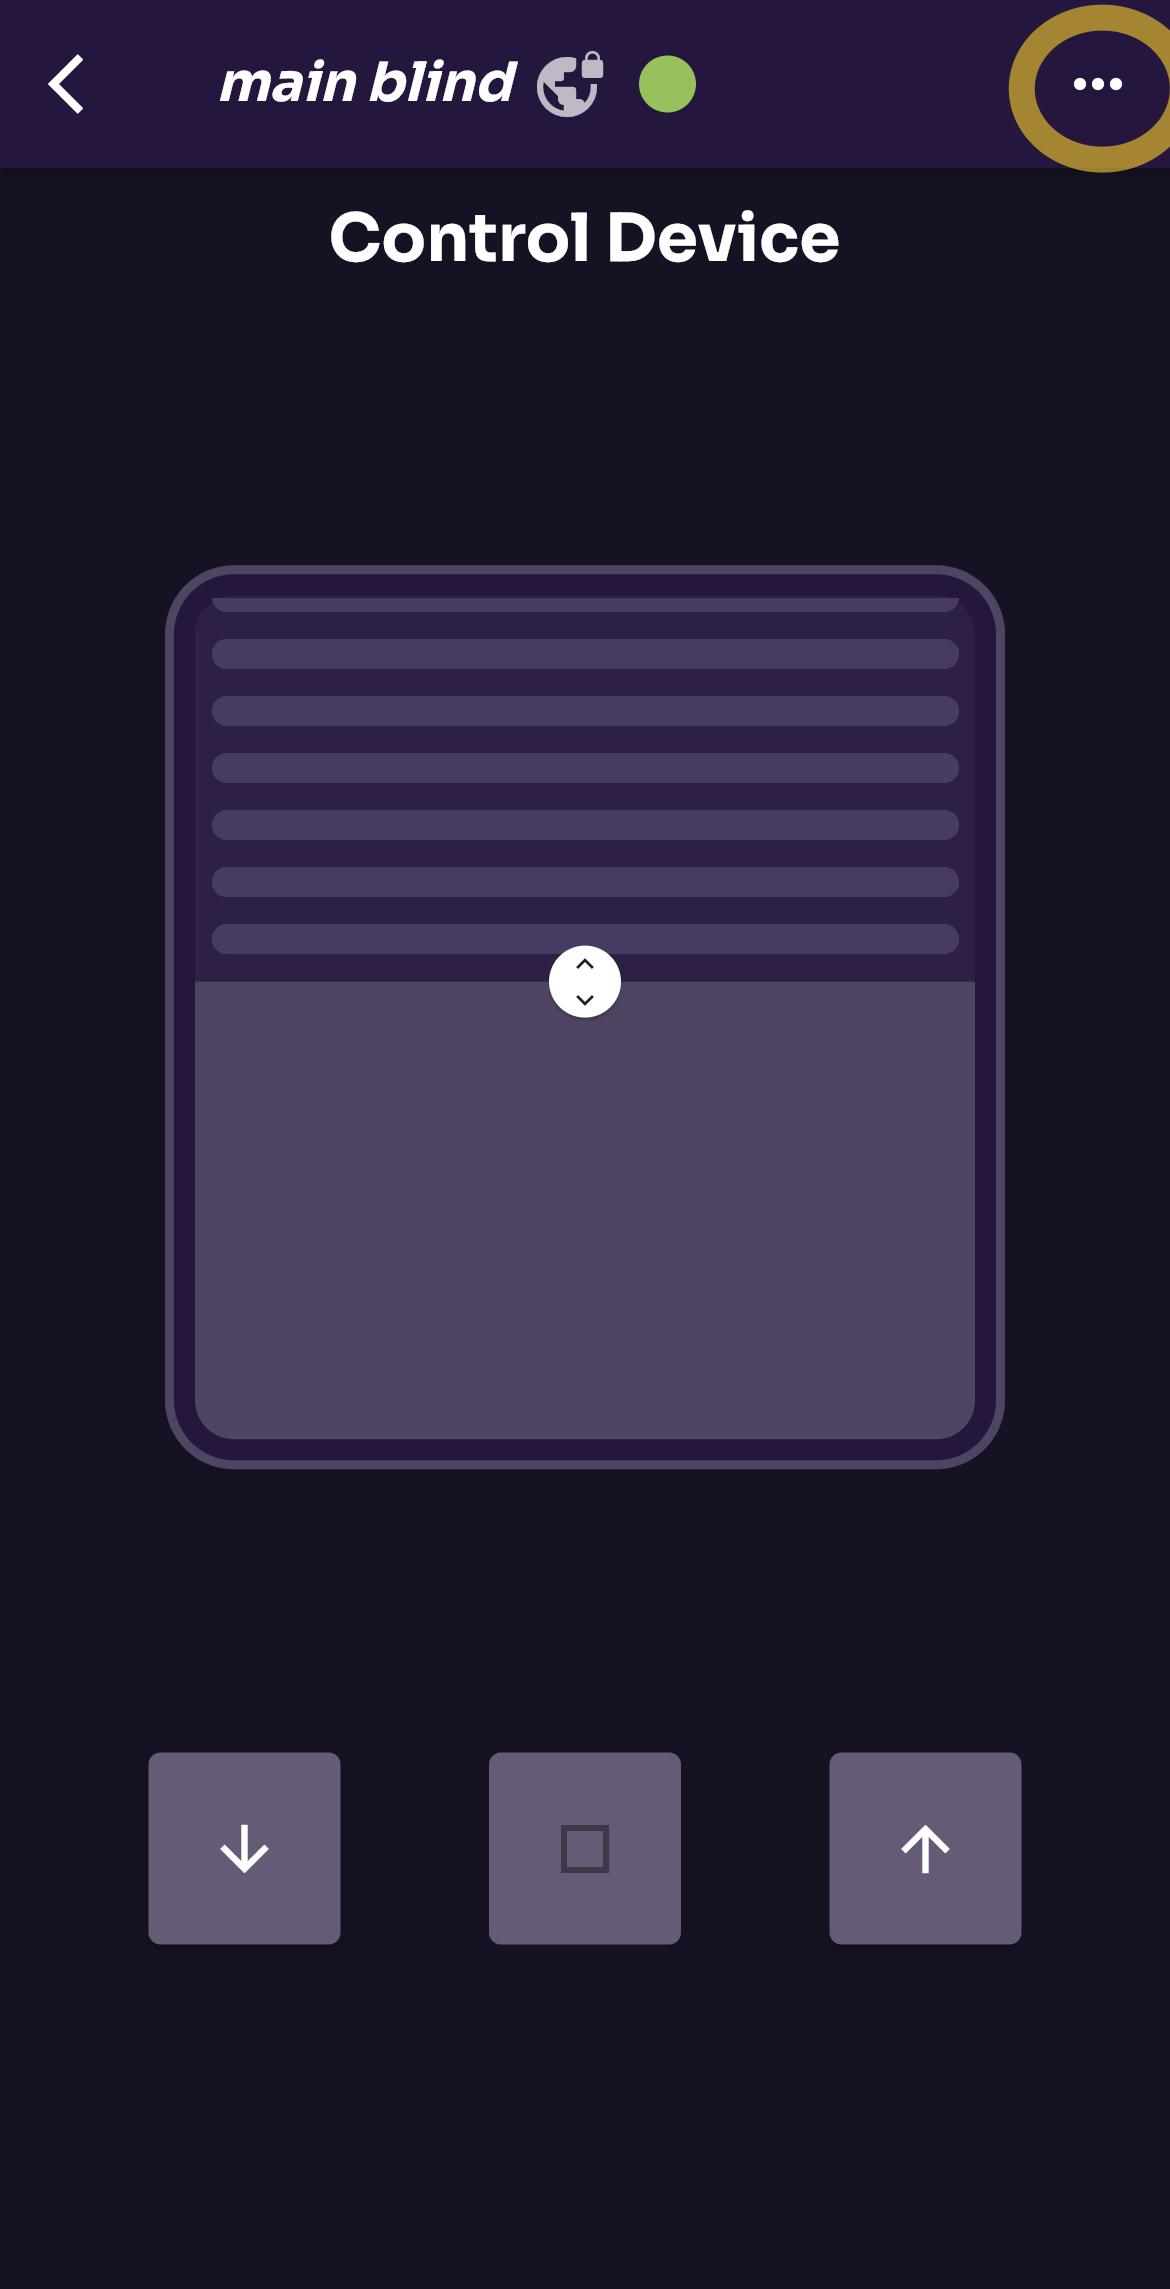
By pressing on a more button on the top right you can access:
Schedule
The module allows you to set up 10 scheduled automatic events. Depending on the type of the device, you can set up:
- turning a switch on or off (for Switch),
- position a shutter in a certain position (for Shutter).
Schedule can be set on repeat on a given day or a couple of days in a week.
You can also set the task to execute on sunrise or sunset at your location. You can also adjust the time of the event (e.g. 15 minutes before the sunrise).
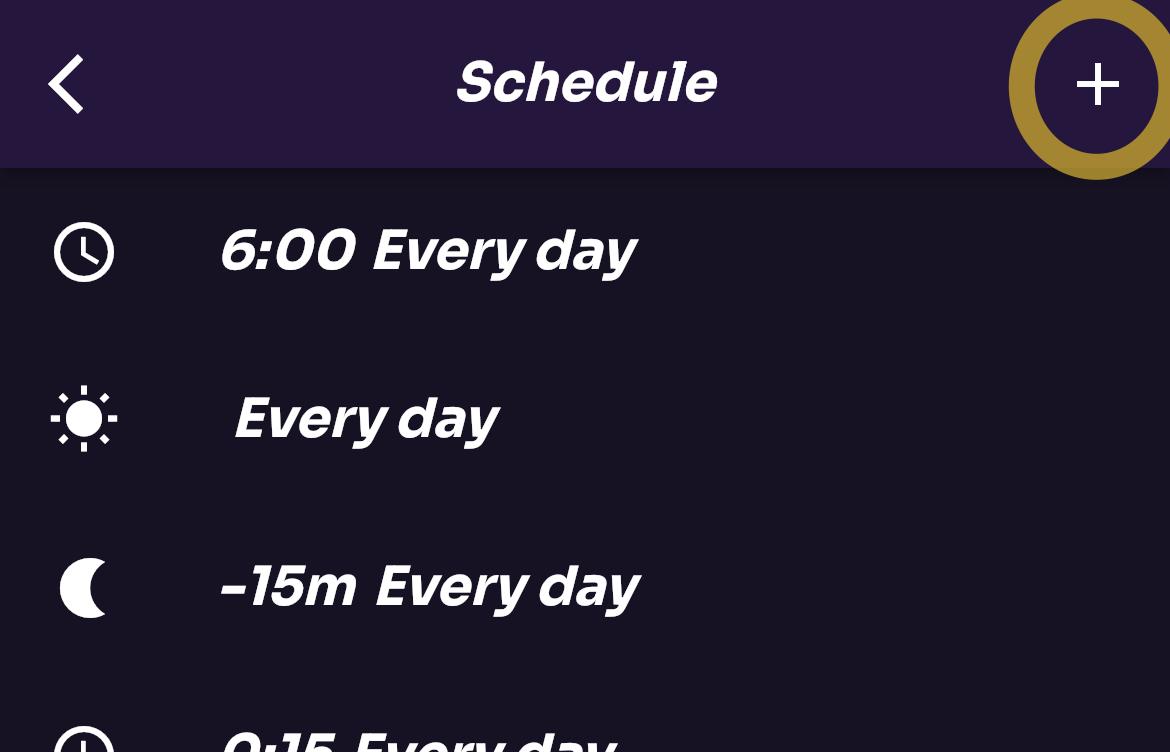
Set Scheduled Event
To set up a scheduled event, go to the control screen of selected device, touch more button on the top right and select Schedule. You will see a list of scheduled events. To add a schedule, press add button on the top right.
Set the schedule according to your needs and select action that should take place.
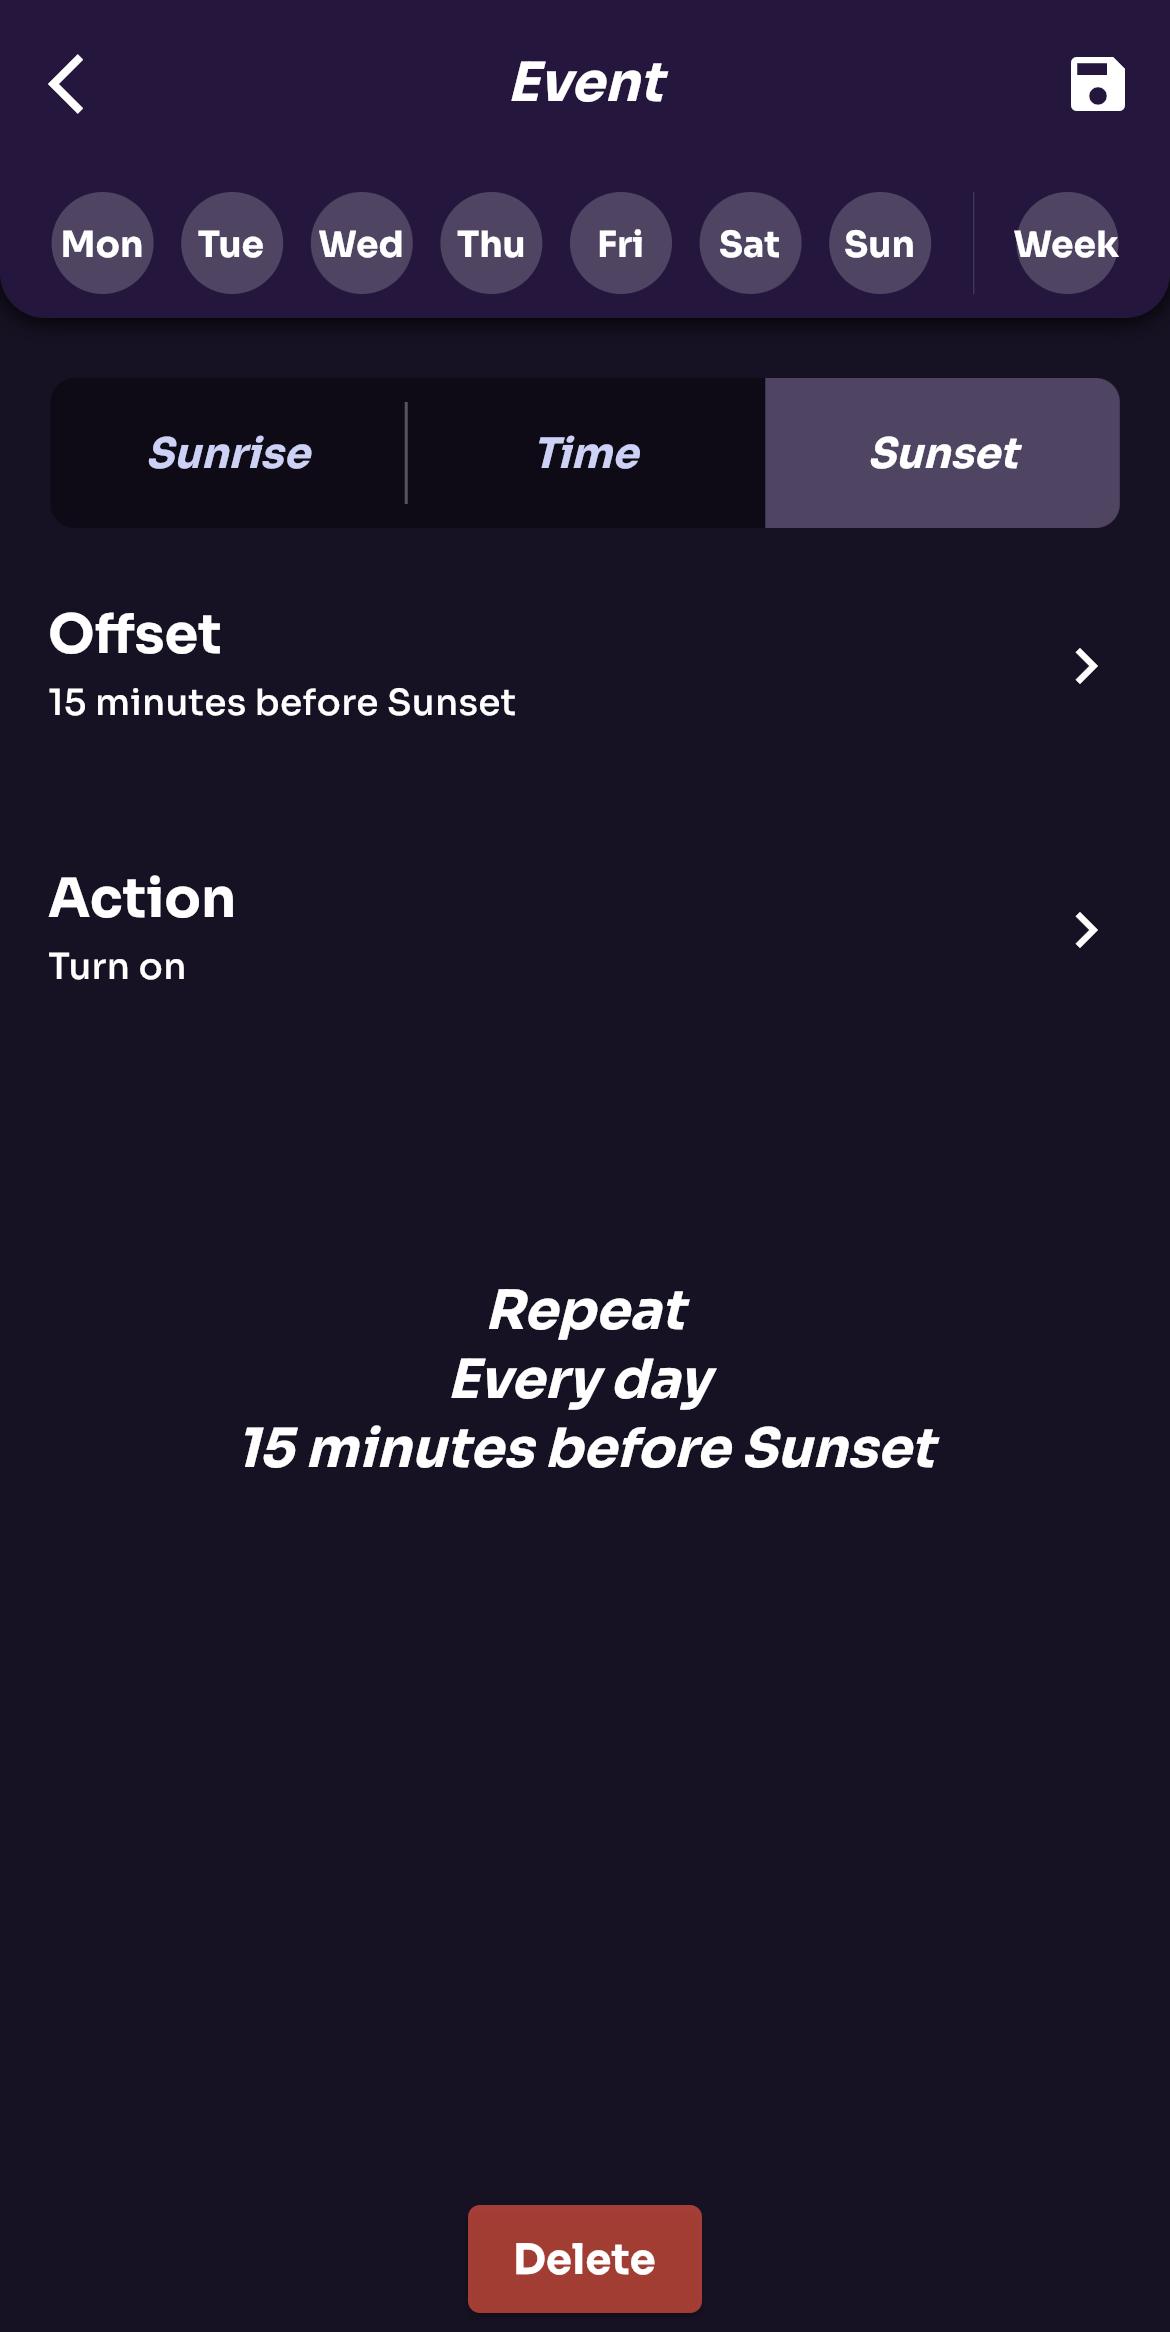
Edit Scheduled Event
To edit the event, select an event on the list and edit a task. Then save by pressing Save icon on the top right.
Delete Scheduled Event
To remove scheduled event, edit a task and then press Delete at the bottom of the screen.
Additional Information About the Algorithm of Calculating Sunrises and Sunsets
To calculate sunrise or sunset, the module needs to know the location of your device – that's why WiseWave app asks for access to location services.
Sunrises and sunsets are calculated on device: we do not pass your location to any external services.
There are some limitation to the schedule based on sunrise/sunset
If the calculated date would fall:
- after midnight on the next day, the task will be executed just before midnight on a current day,
- before midnight on the previous day, the task will be executed just after midnight on a current day.
For example: when sunset is at 9:00 PM and the task should be executed 4 h after sunset, so at 1:00 AM on the next day, the task will be executed at 11:59 PM. When sunrise is at 3:30 AM and the task should be executed 4 h before sunrise, so at 11:30 PM on the previous day, the tesk will be executed at 12:01 AM.
Other edge cases include polar nights and days: algorithm takes into account that there might be no sunrise or sunset on particular day.
The on-device algorithm has limited precision: there might be slight differences between calculated dates by the device and by other sources of sunset/sunrise time.
Device Settings
On the device settings screen you can check the following information:
- device type,
- Wi-Fi network parameters.
Depending on the type of device and method of communication with the device you can:
- set name and room of the device,
- set timezone and location,
- set initial state (after power on),
- set type of input (monostable or bistable)
- calibrate shutter.
You can also:
- force update firmware,
- restart the device.
All settings are saved on the device only.
Removing and unpairing a Device
-
Unpair device will unpair a device. Unpairing will remove the device from the app and revert it to initial settings.
-
Remove device will remove the device from the app without unpairing (useful in case of troubleshooting).
By using Remove device, the device will be removed from the app but will not be unpaired. To add it to the app again, you need to unpair it first, see: Resseting module's Wi-Fi settings and Pairing.
Shutter Calibration
Shutter requires calibration before you are able to control the device remotely.
Simplified control without calibration is available via physical input buttons only, by pressing and holding in the direction of movement.
To start calibration process, enter shutter control screen. Press Calibrate above the representation of the shutter.
If the device is already calibrated, press on the control screen and choose Device settings, then Calibration.
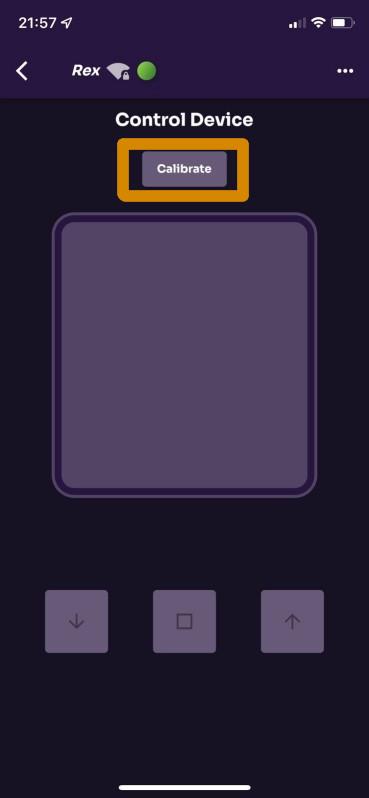
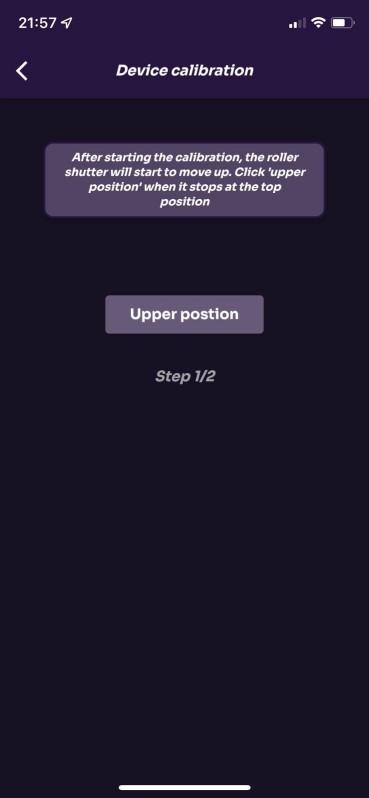
Then follow the on-screen instructions. The first step is to put the shutter into the top position. Press the Start calibration button on screen to start moving the shutter up.

Press Upper position as soon as shutter stops in the upper position.
Next, we need to establish where the Lower position is. Press the Start measurement for the shutter to start moving down.

Press Lower position as soon as the shutter stops at the lowest point.
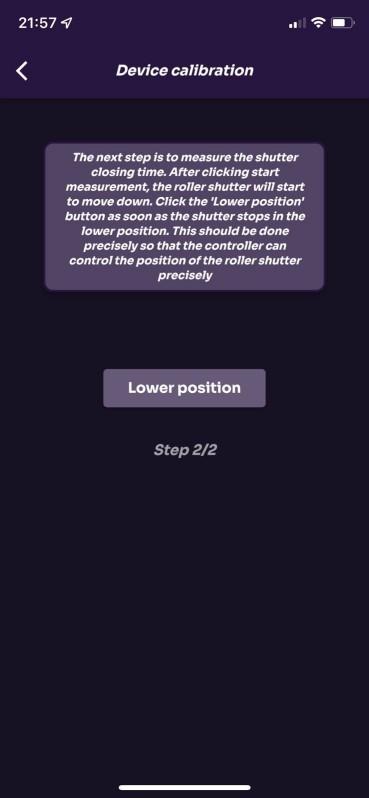
After this step, the calibration is complete.
To recalibrate, press on the control screen and choose Device settings, then Calibration.
Unpairing the device resets calibration.
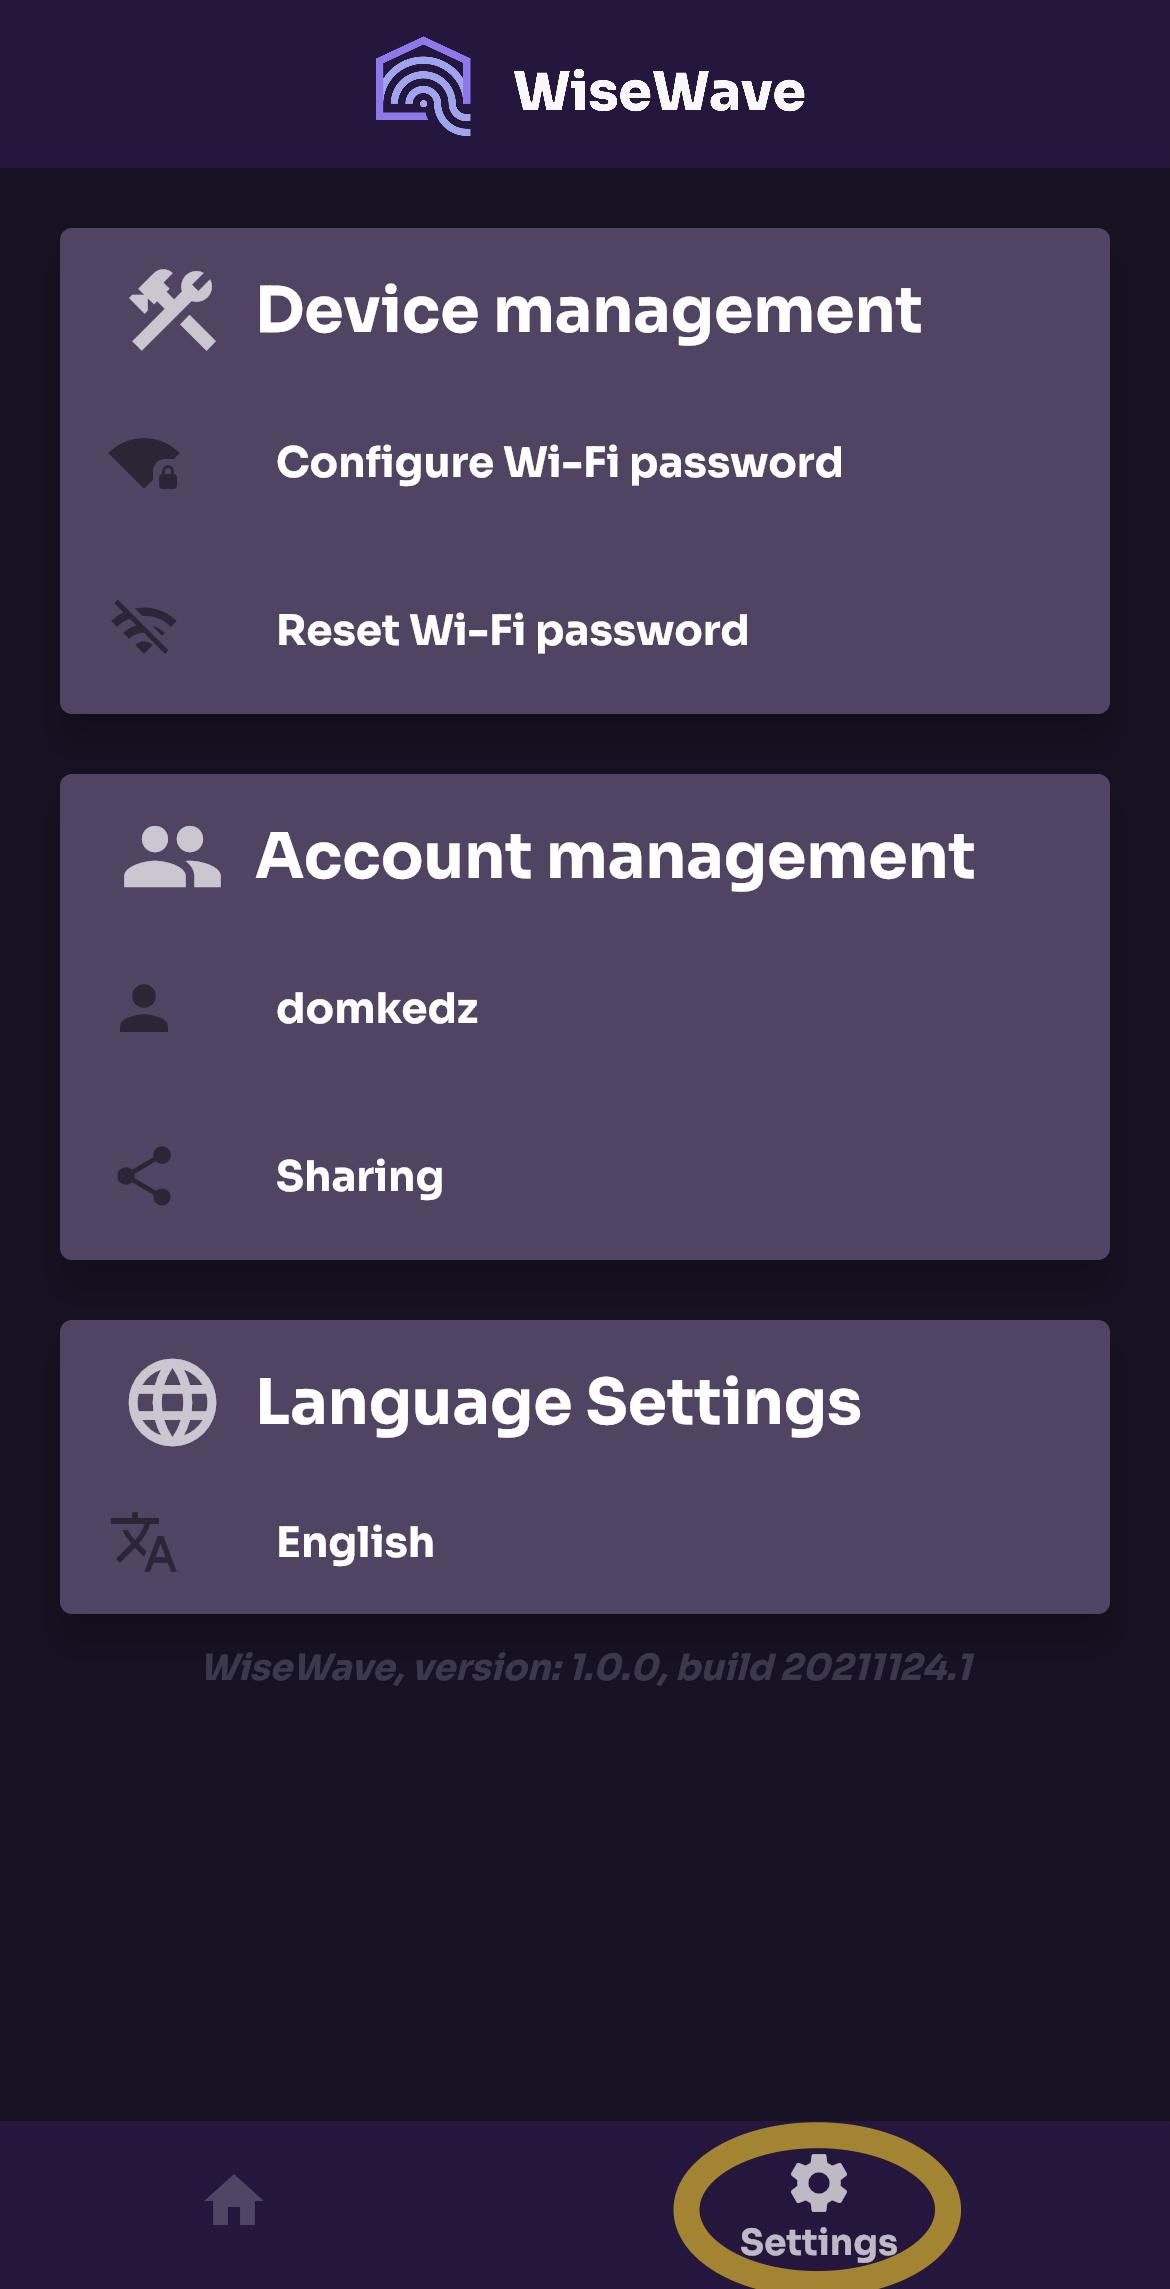
Settings
In Settings, you can find the following sections:
- Device management – which manages devices' Wi-Fi connection,
- Account management – which manages logging in and sharing,
- Language settings
Device Management
Connecting a Device to the Wi-Fi Network
Once your device is connected to the power source, search for Wi-Fi networks on your smartphone.
You should be able to find a network called like so: WiseWave-(device type)-(number). Connect to that network.
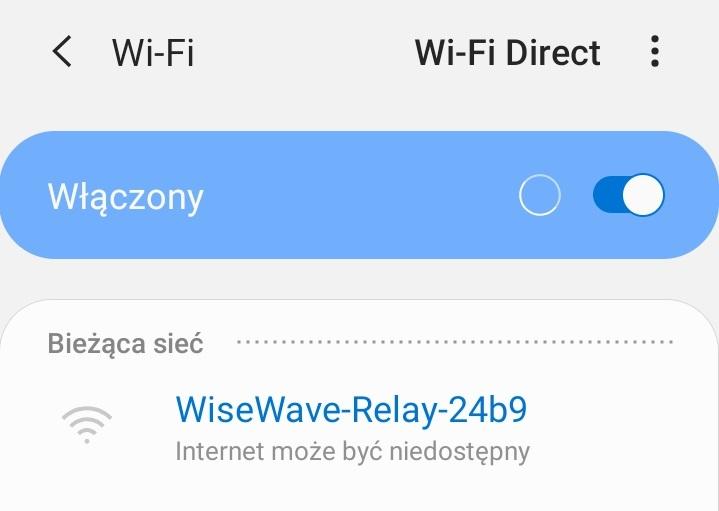
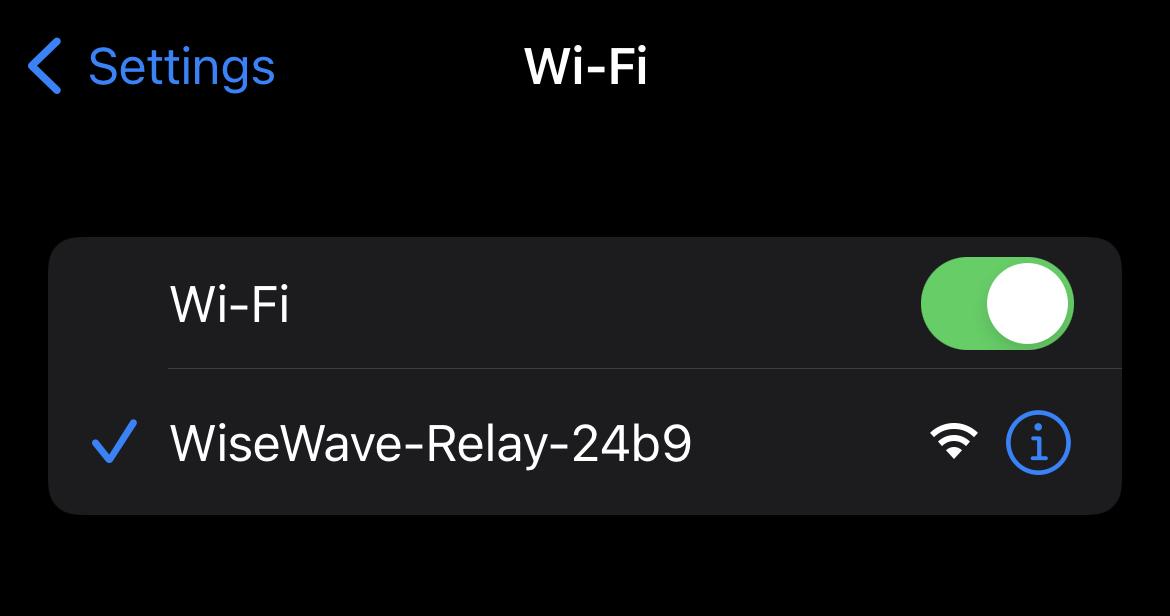
Note: If the network is not visible a few seconds after connecting the device to power, check whether it is connected correctly.
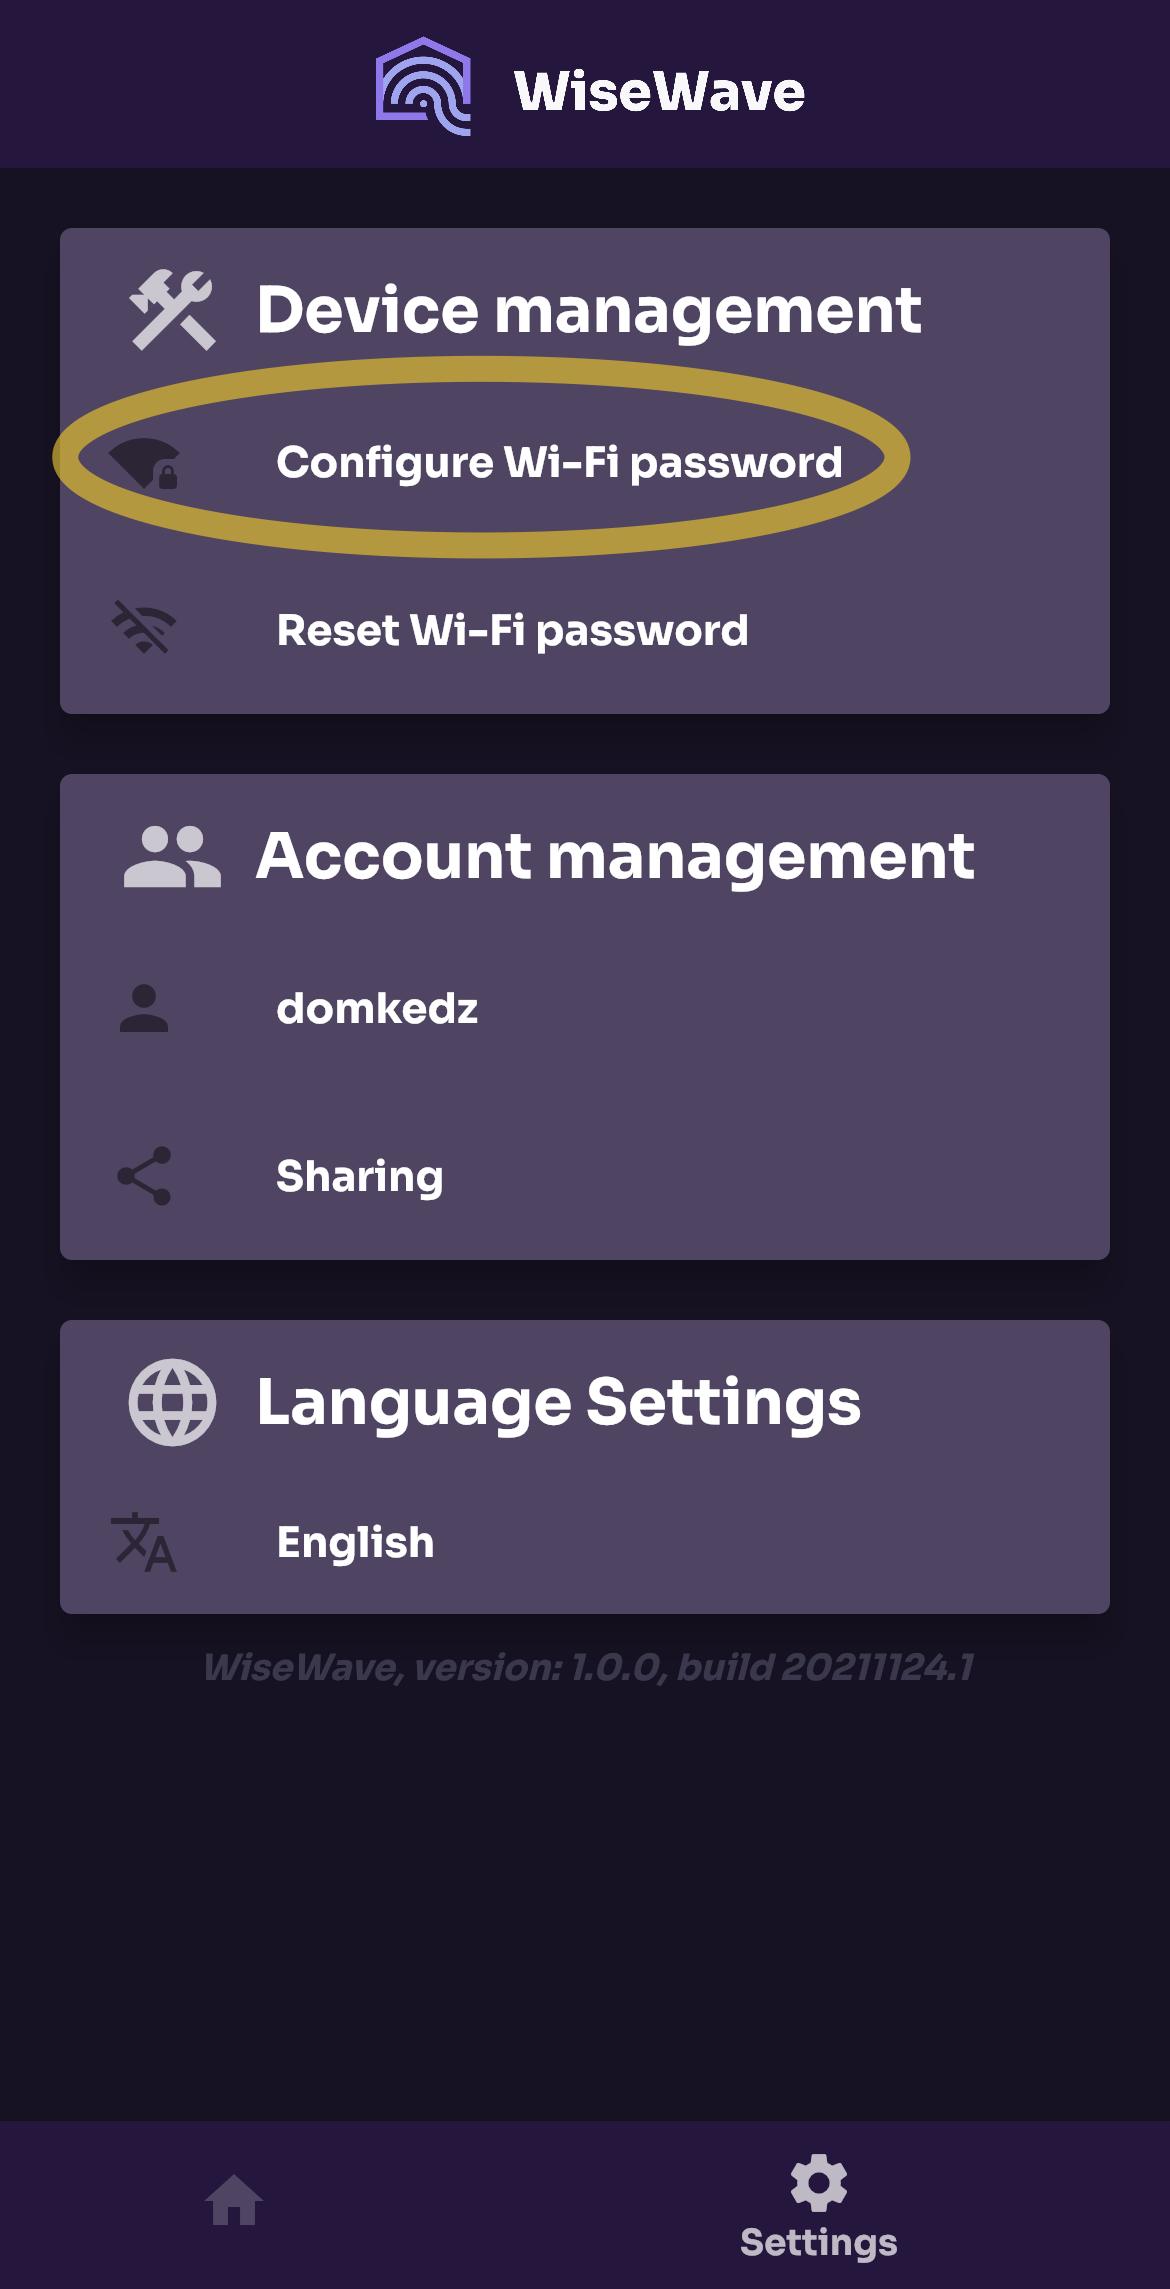
After that go to Settings on the bottom of the screen and select Configure Wi-Fi password.
Instructions similar to these will appear on the screen. If your smartphone is connected to device's network, press Scan.
If you cannot proceed beyond this point, make sure that your phone is connected to the network created by the module, called
WiseWave-(device type)-(number).
When the scan is complete, select the name of your home Wi-Fi network from the list and type password. Then press Connect.
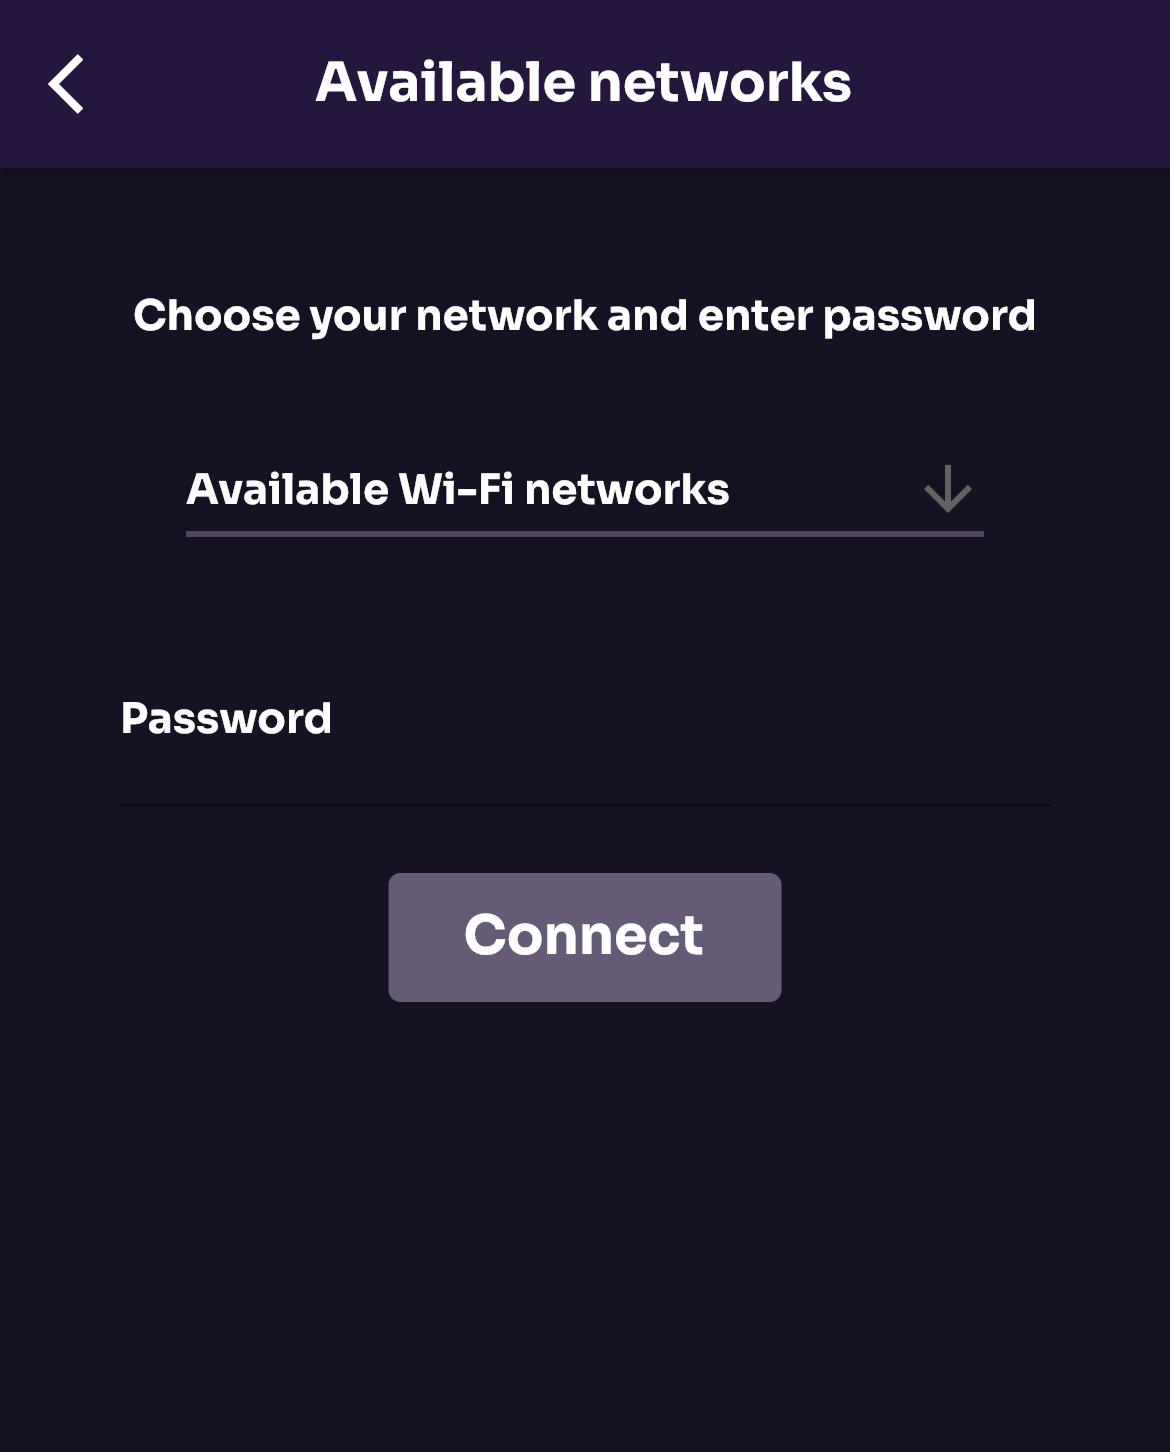
The module will find 15 Wi-Fi 2.4 GHz networks with the strongest signal.
The module will disconnect with your phone and try to connect to the network you selected. Press Home to move to the main screen. In a meantime, your smartphone should connect back to your home Wi-Fi.
If provided password is not correct and the module creates
WiseWave-(device type)-(number)network again, the whole procedure has to be retried.
After connecting to the Wi-Fi network for the first time, the device has to set itself up. It might take around a minute.
Resetting Module's Wi-Fi Settings
Press Reset Wi-Fi password.
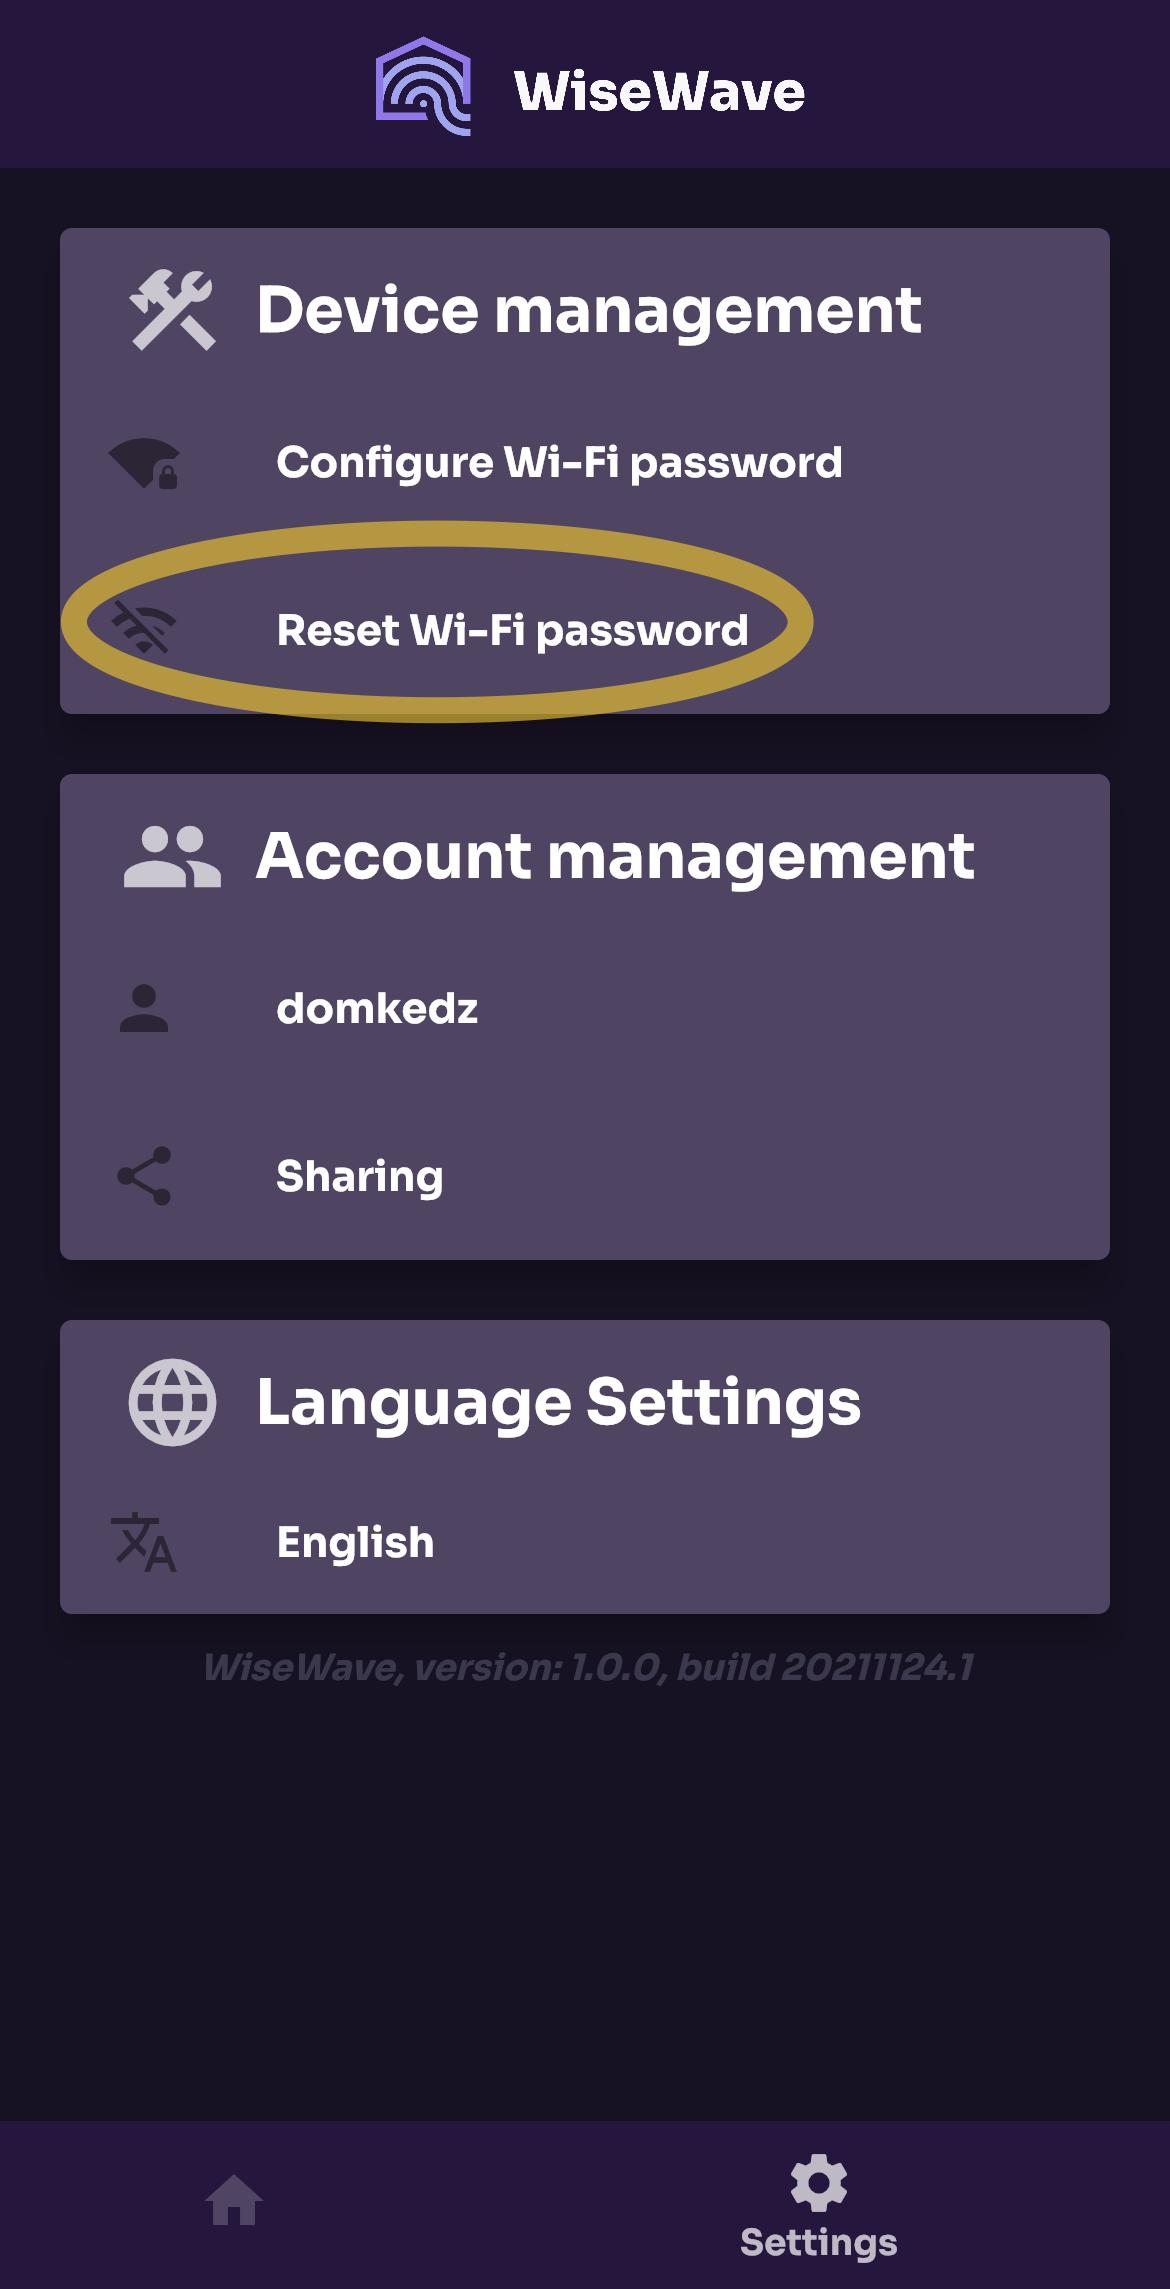
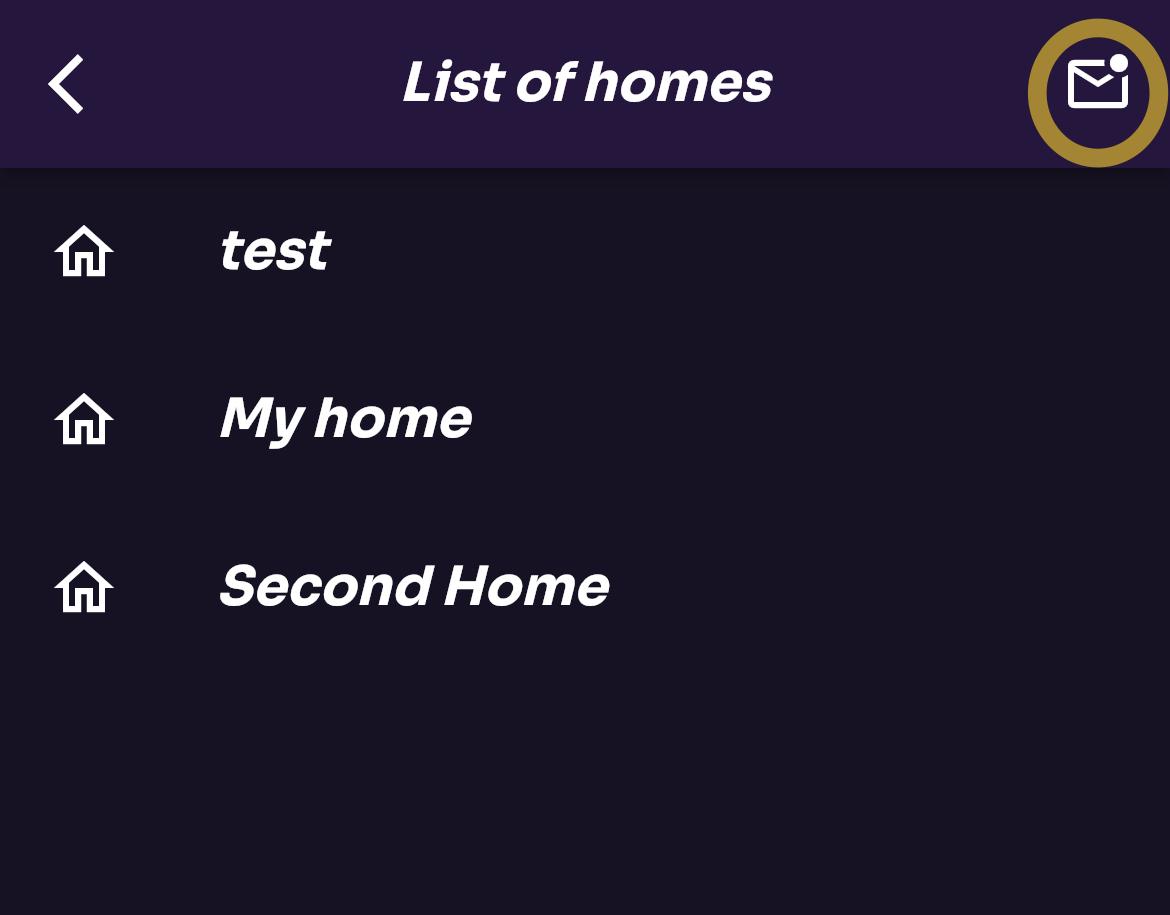
You'll be presented with a list of WiseWave devices connected to Wi-Fi you are connected to.
Select the device you want to reset and press Reset.
Note: resetting Wi-Fi settings will not unpair the device.
You can also unpair selected device. This option is helpful when you reinstalled your app. In this case you need to unpair the device, add it to the app and pair again.
It is also possible to reset the Wi-Fi network settings through the input, a button on the wall connected to the device. To do this, quickly click ten times on one of the inputs.
Accounts and Sharing
Account Management
You don't need an account to use WiseWave module. You will be able to control your device from within your home Wi-Fi network only. Creating an account allows you to:
- safely and remotely control your devices from the outside of your home network, using encrypted communication,
- sync your home configuration (you will be able to restore your configuration from the cloud),
- share your home to other WiseWave app users.
Register
To register, go to Settings screen and select Log in. Then press Register instead.
Logging In
Go to Settings screen and select Log in.
Logging Out
Go to Settings screen and select your account name. Then press Log out.
Sharing
You can share your home in the app to members of your famiy. Both you and the person you want to share the home to, have to have accounts.
Person you share the home to will have a full control over devices and room management. Be careful who you share your home with.
Sending an Invitation
To send an invitation, you need to know a username of a person you want to share home to. Username can be seen on the Settings screen in the Account management section.
To invite, in the Account management section choose Sharing option. Then select home you want to share.
You will be presented with a list of users that have access to this home. To add a new member and send them an invitation, press add user button (located top right) and provide their username.
Approve or Reject an Invitation
To approve or accept an invitation, in Account management section go to Sharing. Then press invitation box icon on the top right and select an invitation you want to accept or reject.
Cancel Invitation
To cancel invitation, in Account management section, press Sharing. Then select a home. You will be presented with a list of users that have access to this home. Select the user you want to remove.
Privacy Policy: WiseWave app
This privacy policy will explain how our organisation uses the personal data we collect from you when you use our mobile application WiseWave, available at Google Play Store and Apple App Store.
Who is the Controller of the data?
The controller of your data is:
DOMCODE Dominik Kędzierski
Zamoyskiego 1, 65-255 Zielona Góra
What data do we collect and why?
While using WiseWave app, Our Company collects the following data:
- Without registration:
- Your IP address,
- With registration, in addition to the ones above:
- Username you give us during the registration process,
- E-mail address you give us during the registration process,
- SSID (name) of your Wi-Fi network.
Your IP address appears in our logs, although we do not associate users with their IPs. These logs are “rotated” i.e. new logs will remove the oldest ones.
SSID is the name of your Wi-Fi network, we use it for the WiseWave application algorithm to understand if you are working inside or outside your home’s network.
WiseWave application asks for access to location services and to scan your network for other devices. Location data is only sent to WiseWave modules and is not sent to our servers or third party nor is processed by us. The only data on scanned devices is data about WiseWave modules that is synchronised with the cloud when you are registered and logged in. No information about other devices is processed.
WiseWave application sends your timezone to our servers, but this data is not gathered nor processed by us and is sent to a separate service which has no access to other user data we process.
All your personal data is processed solely on a purpose of providing you services offered by WiseWave application.
How do we collect your data?
We collect and process the data when you:
- Use an app,
- Register to the app (which is optional).
How will we use your data?
Our Company collects your data so that we can:
- Finalise the registration process using e-mail confirmation,
- Provide you with the service offered by the WiseWave application,
- Perform maintenance of our services.
When using the Sharing feature, data regarding your devices, your username and SSID of your network will be shared with a user of the WiseWave application you choose.
How do we store your data?
Our Company securely stores your data at Warsaw WAW1/2 Datacenter.
We store your email address, username and SSID of your networks from the moment you register to the moment your request to remove your account is processed.
Age Limits
We do not knowingly collect any personal data from children below 13 years. If you are below 13 years, please do not provide your personal data to us. If we discover that we hold any such data, we will promptly delete it.
What are your data protection rights?
Our Company would like to make sure you are fully aware of all of your data protection rights. Every user is entitled to the following:
- The right to access – You have the right to request Our Company for copies of your personal data.
- The right to rectification – You have the right to request that Our Company correct any information you believe is inaccurate. You also have the right to request Our Company to complete the information you believe is incomplete.
- The right to erasure and restrict/object to processing – You have the right to request that Our Company erase your personal data, under certain conditions. However, you will not be able to use parts of the WiseWave application that require having an account (Sharing, Remote control).
If you would like to exercise any of these rights, please contact us at our email: [email protected]
Changes to our privacy policy
Our Company keeps its privacy policy under regular review and places any updates on this web page. This privacy policy was last updated on 26 February 2022.
How to contact us
If you have any questions about Our Company’s privacy policy, the data we hold on you, or you would like to exercise one of your data protection rights, please do not hesitate to contact us.
Email us at: [email protected]